If you like reading more than watching, we’ve got you! Here are the insights from our latest webinar “Creative Artwork Customization You Can Do with Lumaprints,” where we share custom wall art ideas for customizing your artwork and giving each piece a more distinctive presentation. Jump to any topic using the shortcuts below:
Why Artwork Customization Matters
Online shoppers have countless wall art options. Your style already gives your work its own identity, but how you present it can help it stand out even more. Retail stores have been trying different substrates, textures, treatments, and presentation styles to make wall art feel more unique, and artists can borrow from those approaches when deciding how to present their own work.
Lumaprints goes beyond letting you choose a print size. Depending on the product, you can choose mats, frame styles, fine art paper types, canvas wraps, and other presentation options. The goal is to find options that complement your artwork, not to change the artwork itself, and to give customers another reason to stop and take a closer look. The custom wall art ideas below show how small changes can make a big difference.
Wall Art Display Ideas for a Curated Look
A curated presentation can make your artwork feel intentional and give your collection a one-of-a-kind look. To find wall art display ideas, research retail stores with strong wall art collections or browse interior designers’ portfolios. Notice how they combine artwork with frames, mats, materials, colors, and surrounding decor.
Current trends can help too. Creative mats, natural wood tones, and organic finishes are a few ways to refresh artwork without changing the original piece. Even if your artwork is years old, a new frame, mat, or print format can give it a fresh look that fits what customers are drawn to now.
When someone visits your store, the image shouldn’t be the only thing that stands out. The substrate, frame, mat, or border can make the finished product feel more intentional too.
Using Mats to Elevate Your Artwork
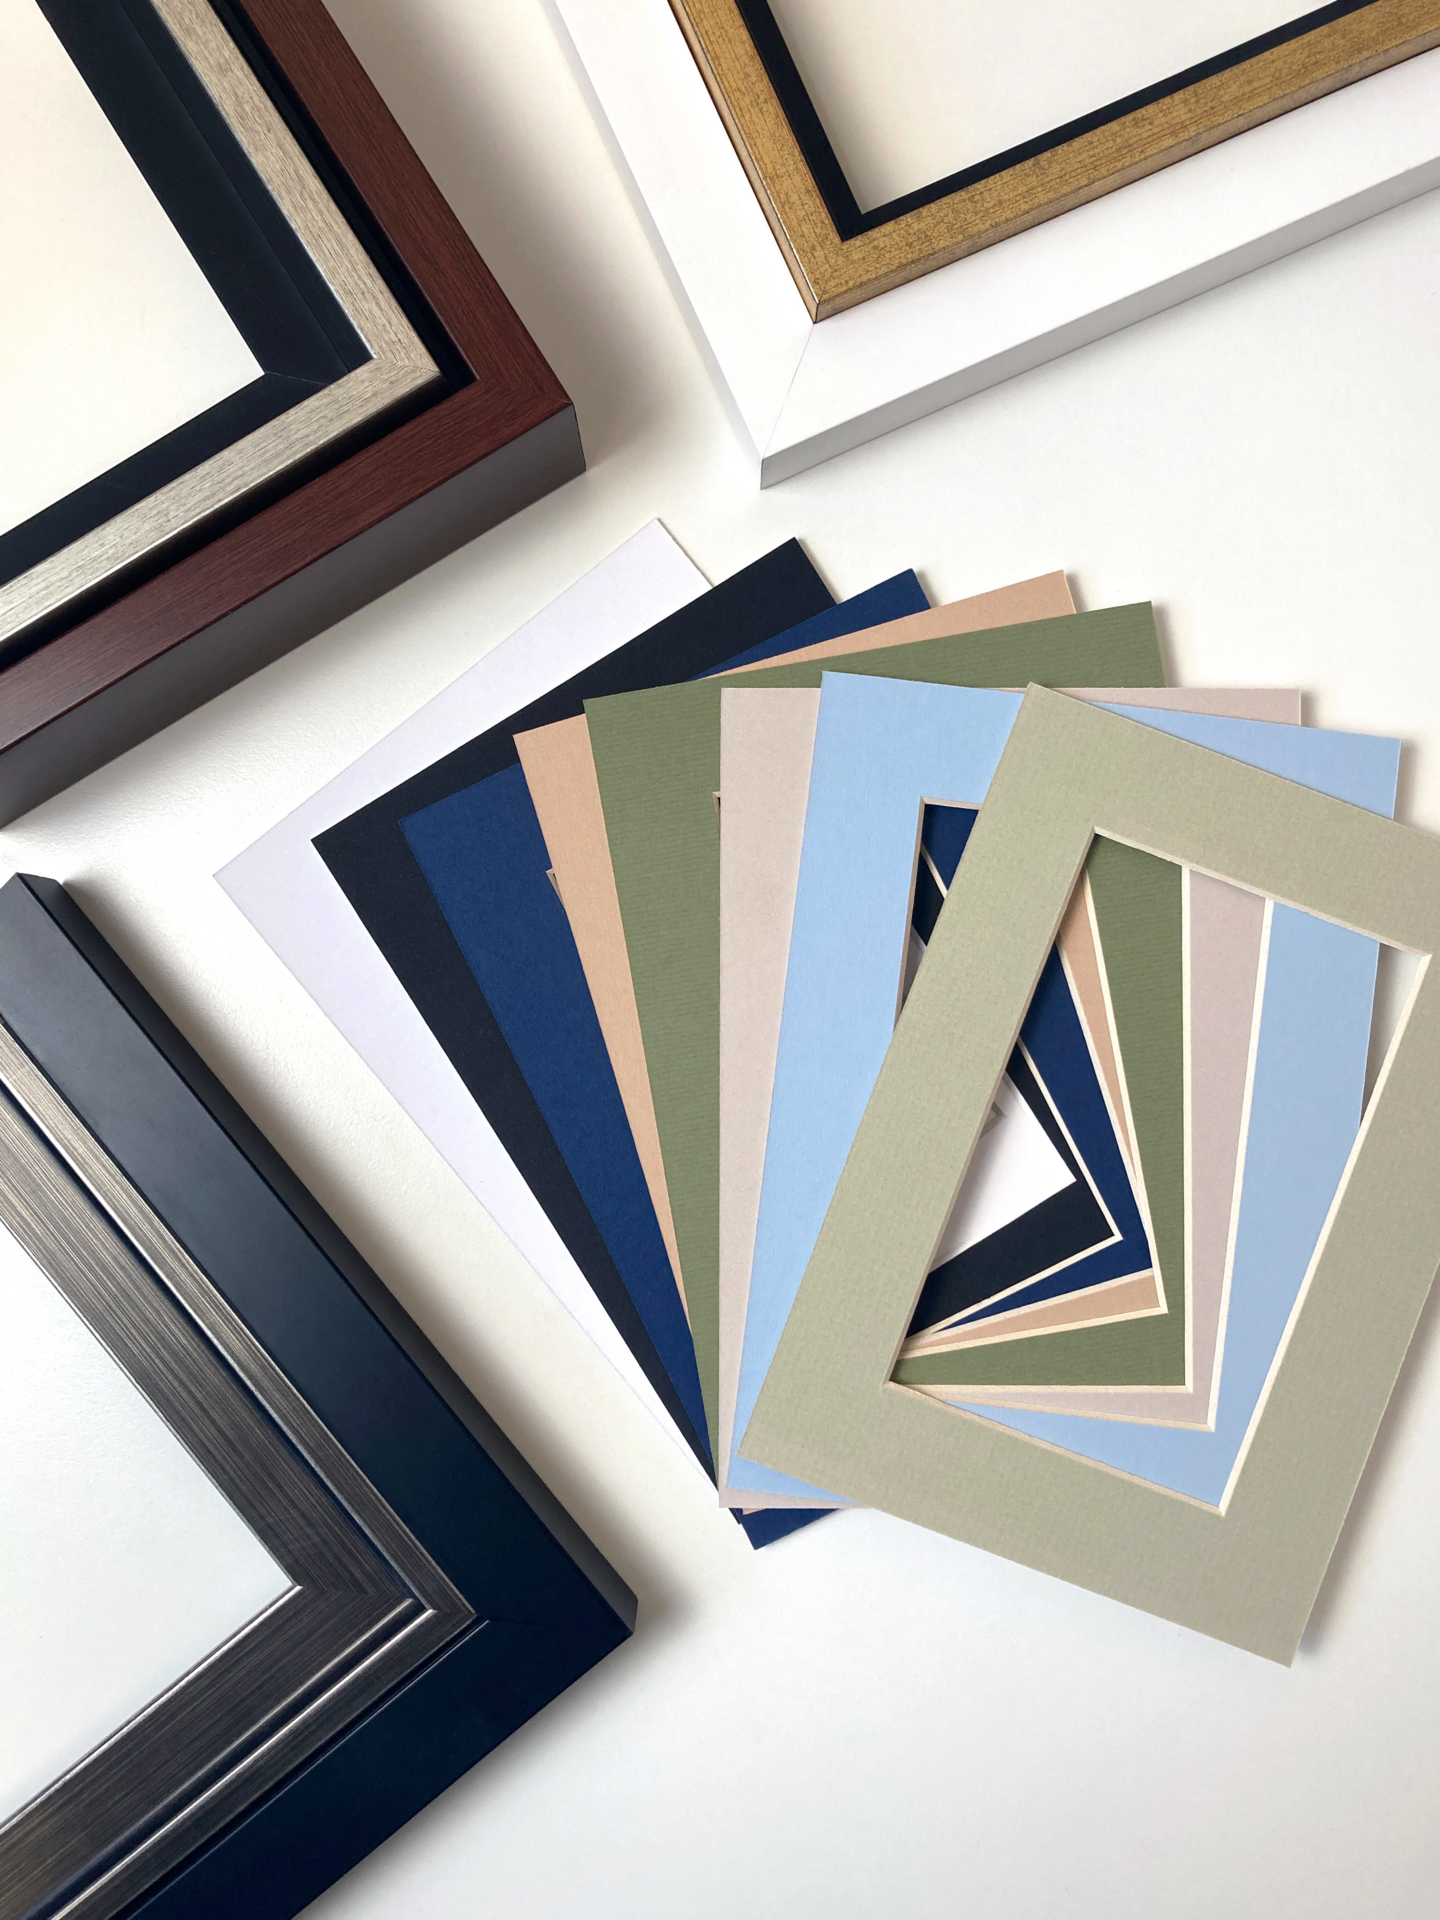
Mats add another visual element to framed artwork, and different colors and widths can change the mood of a piece completely. For a clean, modern look, try a monochromatic combination in black, white, or silver. One webinar example paired a black mat with a black frame around a colorful floral photograph. The darker presentation made the colors in the artwork stand out most.
You can also match mat and frame colors to the subject. For nature and landscape pieces, wood frames can work well with green mats or warmer neutral tones. For coastal photography and artwork, white or distressed white frames pair with light blue, dark blue, bright white, or off-white mats. These combinations link the artwork and its presentation without overpowering the image.
Think of the mat as more than just a border. Its color and size help set the mood of the finished piece.
Customizing Stretched Canvas Borders
The sides of a stretched canvas are another place to customize. When you order stretched canvas prints with Lumaprints, you choose from three wrap options: solid color, image, and mirror. An image wrap continues the front image around the sides of the canvas, while a mirror wrap reflects the edges of the image onto the sides.
A solid color wrap lets you pick a color that complements the artwork. Use a color picker tool in your editing software to sample a color straight from the image. You can choose a highlight color already in the artwork or a contrasting one that makes the image stand out. A coastal image, for example, could take its color from the water, the sky, or the darker rocks in the photograph.
Another webinar example used a lavender border taken from a floral still-life image, which gave a soft pastel look that complemented the artwork. A brighter magenta or blue from the same image would have made a stronger, more energetic contrast. Which color you choose depends on the mood you want the finished piece to have.
You can also make custom borders with patterns or illustrations that complement the front of the artwork. Lumaprints provides canvas templates for these designs. Detailed borders work best on deeper canvases, where there’s enough room for the design to show. A well-chosen border can make an unframed canvas feel more finished and still cost customers less than a framed canvas.
Creating Diptychs, Triptychs, and Multi-Panel Art
Large artwork doesn’t have to be printed as one oversized piece. If the composition allows it, you can divide an image into a diptych, triptych, or larger multi-panel display. Splitting an image adds visual interest and gives customers more flexibility in how they display it. It can also make a large image feel more dynamic, since viewers experience different sections of the composition separately.
Multi-panel artwork can also save on shipping. Instead of producing one 90 × 40-inch panoramic piece, for example, you could divide the image into three 30 × 40-inch panels. The customer still gets a large wall display, but the individual pieces are easier to package and can help reduce the cost of shipping oversized artwork.
Diptychs and triptychs also open up more wall art display ideas by giving customers different hanging options. A vertical diptych, for example, can hang with both panels aligned evenly or with one slightly lower than the other. Think carefully about how the artwork will look divided, and look for natural places in the composition to separate the image without cutting through important subjects or details.
Putting Your Customization Ideas Together
Before you create your final product, start with the artwork itself: its color palette, subject matter, composition, and overall mood. Then think about which substrate suits the image. Lumaprints offers fine art paper, canvas, metal, and peel-and-stick products, with more customization depending on the product.
From there, explore mat colors, canvas border colors, frame styles, and multi-panel layouts. If you’re unsure how the elements will look together, make a mockup before ordering. Even a simple program like PowerPoint works for placing colors, frames, and artwork side by side so you can compare combinations.
Experiment until you find a presentation that works for both your artwork and the customers you’re trying to reach.
Webinar Q&A Highlights
The webinar ended with questions from artists about ordering, printing, shipping, and selling their work.
Can Lumaprints ship artwork directly to a collector?
Yes. Upload your image, select the product, and enter your collector’s information as the shipping address. Lumaprints supports drop shipping and white labeling, so the order can go directly to the customer.
How can oversized shipping costs be reduced?
One option is to break a larger artwork into a diptych or triptych when the composition allows it. Keeping each piece in a smaller size range can help you avoid some oversized shipping costs.
What should you do if an uploaded artwork looks blurry?
Start with the best-quality image you can get. When photographing artwork, hold the camera or smartphone steady with a tripod or a stable surface, and make sure the lighting is good. A timer also reduces camera movement. If you still can’t get a clear reproduction, a professional photographer may be worth hiring.
If you already offer canvas and want another elevated product, try framed fine art paper prints. You can customize the presentation further with different paper types, mats, and frame styles, including more ornate frames.
Which fine art paper should you choose?
The best choice depends on the artwork. A bright, smooth archival matte paper works well for photography, bright colors, and digital designs. Hot Press, Cold Press, and Somerset have more neutral white tones and differ in texture: Hot Press is smoother, while Cold Press has more of a watercolor-like texture.
Semi-gloss paper is another option for photography and bright digital artwork. Metallic paper gives an iridescent effect for artwork that suits a more specialized presentation.
Final Thoughts
Customizing your artwork is more than adding decorative elements. It’s a chance to think about how the artwork, material, mat, frame, border, and overall presentation work together as one finished product. Small changes can produce very different results: a colored mat can set a mood, a solid canvas border can draw attention to a key color in the artwork, and a multi-panel design can turn one image into a larger wall display.
Take inspiration from retail displays and interior design, try different combinations of custom wall art ideas, and make mockups before you commit to a final presentation. Weigh your artistic vision against what your customers may be looking for. The right customization can make your artwork feel more distinctive and give customers a finished piece designed for their space. For more, browse our full webinar library.
Watch the full webinar: Creative Artwork Customization You Can Do with Lumaprints
More webinars available on our channel: Lumaprints YouTube