Introduction
Most of us have hundreds, sometimes thousands, of photos sitting on a phone, computer, or memory card. Family trips, weddings, favorite landscapes, candid moments, and photos of people we care about often get looked at once and then disappear into a camera roll. Turning a favorite image into photo wall art gives that memory a place in your home instead of leaving it behind a screen.
Getting a photo onto the wall, though, takes a little more thought than simply sending a file to a printer. Resolution, cropping, color, material, size, and finishing all affect how the final piece looks. If you want to turn photos into wall art that feels considered and gallery-ready, it helps to prepare the image with the finished print in mind.
This guide walks through the process, from choosing the right photograph to preparing the file, selecting a print material, finding the right size, and giving the finished piece a polished presentation.
Choosing the Right Photos for Printing
Not every image in your camera roll needs to become a large print. Some photos are meaningful because of the moment, while others also have the technical quality needed to hold up when enlarged. The best candidates usually have a combination of emotional value, clear detail, good light, and a composition that still works when viewed from across a room.
As you look through your photos, pay attention to a few practical details:
- Sharp Focus and Clarity: Check the main subject at full size before ordering. A slightly soft photo may look fine on a phone but become much more noticeable once enlarged. Pay particular attention to faces, eyes, architectural details, or anything that should appear crisp.
- Optimal Lighting and Contrast: Photos taken in natural light, during golden hour, or with balanced indoor lighting often translate well to print. Look for detail in both the darker and brighter parts of the image rather than areas that disappear into solid black or washed-out white.
- Phone Photos: Modern smartphones can capture enough detail for many print sizes, particularly in good light. Whenever possible, use the original photo from your camera roll. Images downloaded from social media, messaging apps, or screenshots are often compressed and may contain much less information than the original file.
- Compositional Impact: Step back and imagine the image hanging on a wall. A clear focal point, useful negative space, interesting lines, or a strong sense of depth can make a photograph more satisfying to live with at a larger scale.
The most technically perfect photograph is not always the right one. If an image carries real meaning for you and has enough resolution for the size you want, that personal connection can matter just as much as perfect composition.
Prepping Your File: Resolution, Cropping, and Color
File preparation is one of the biggest factors in whether a digital photograph looks polished when printed. A small image can appear perfectly sharp on a phone but lose detail when stretched across a large canvas or fine art print.
For digital images, resolution is generally discussed in pixels per inch, or PPI, while printer output may be described in dots per inch, or DPI. In everyday print workflows, you will often see the terms used together. Lumaprints recommends preparing files around 200 to 300 DPI at the intended print size. The technical minimum is 72 DPI, but that should not be treated as the target for a gallery-quality result.
Here is Lumaprints’ current reference table:
| Print Size | Minimum (72 DPI) | Canvas Optimal (200 DPI) | Fine Art Optimal (300 DPI) |
| 8″ x 10″ | 576 x 720 px | 1600 x 2000 px | 2400 x 3000 px |
| 11″ x 14″ | 792 x 1008 px | 2200 x 2800 px | 3300 x 4200 px |
| 16″ x 20″ | 1152 x 1440 px | 3200 x 4000 px | 4800 x 6000 px |
| 20″ x 24″ | 1440 x 1728 px | 4000 x 4800 px | 6000 x 7200 px |
| 24″ x 36″ | 1728 x 2592 px | 4800 x 7200 px | 7200 x 10800 px |
Cropping deserves just as much attention as resolution. Most phone cameras capture images at a 4:3 ratio, while many traditional cameras use 3:2. An 8 x 10 print uses a different 4:5 ratio, which means part of the original photograph may need to be cropped.
Check the crop before ordering rather than assuming the whole image will fit. This is especially important with portraits, where a small change can cut into a person’s head, hands, or other important details. Adobe also provides a useful guide to image size and resolution if you want to check pixel dimensions before preparing a large print.
Color is another area where the screen and printed result can differ. Screens produce light, while a print reflects it, so an image will not always look identical in both places. Lumaprints’ workflow converts supported files as needed for printing. Photographers who want more control can also soft-proof their image in editing software using a calibrated monitor and the appropriate ICC profile before placing an order.
Choosing the Right Material: Canvas, Paper, or Metal
The material changes more than the surface of a photograph. It affects texture, reflection, detail, color appearance, and how the finished piece fits into the room.
A family portrait may feel completely different on textured canvas than it does on smooth fine art paper. A bright cityscape or colorful travel photograph can take on another character when printed on metal. There is no single best choice for every image, so think about both the photograph and the space where it will hang.
| Material | Visual Finish | Best Photo Styles | Recommended Placement |
| Canvas Prints | Classic woven texture, rich color, no reflection glare. Printed with eco-solvent giclée inkjet. | Family portraits, landscapes, oil-painting style photography. | Living rooms, bedrooms, cozy hallways. |
| Framed Canvas | Elevated gallery wrap surrounded by a floating wooden frame. | Formal portraits, architectural shots, fine art compositions. | Above fireplace mantels, executive offices, main foyers. |
| Fine Art Paper Prints | Smooth or textured archival matte paper with crisp detail. Printed via aqueous pigment Canon giclée printers. | Black & white portraits, macro shots, high-detail nature. | Gallery walls, dining areas, study rooms (under glass). |
| Metal Prints | Glossy aluminum sheet, high contrast, radiant color, produced via dye-sublimation. | Vibrant nightscapes, city skylines, bold abstract photography. | Modern kitchens, bathrooms, moisture-prone spaces. |
You can explore the existing Lumaprints product options through canvas prints, framed canvas, fine art paper prints, and metal prints.
Sizing and Placement Guidelines
Choosing the image is only half the decision. The size of the finished photo wall art can completely change how it feels in the room.
One common mistake is choosing a print that looks large while ordering online but feels undersized once it is placed above a sofa, bed, console, or other substantial piece of furniture. Before ordering, measure the wall and the furniture around it rather than judging the size from the screen.
A few general guidelines can help:
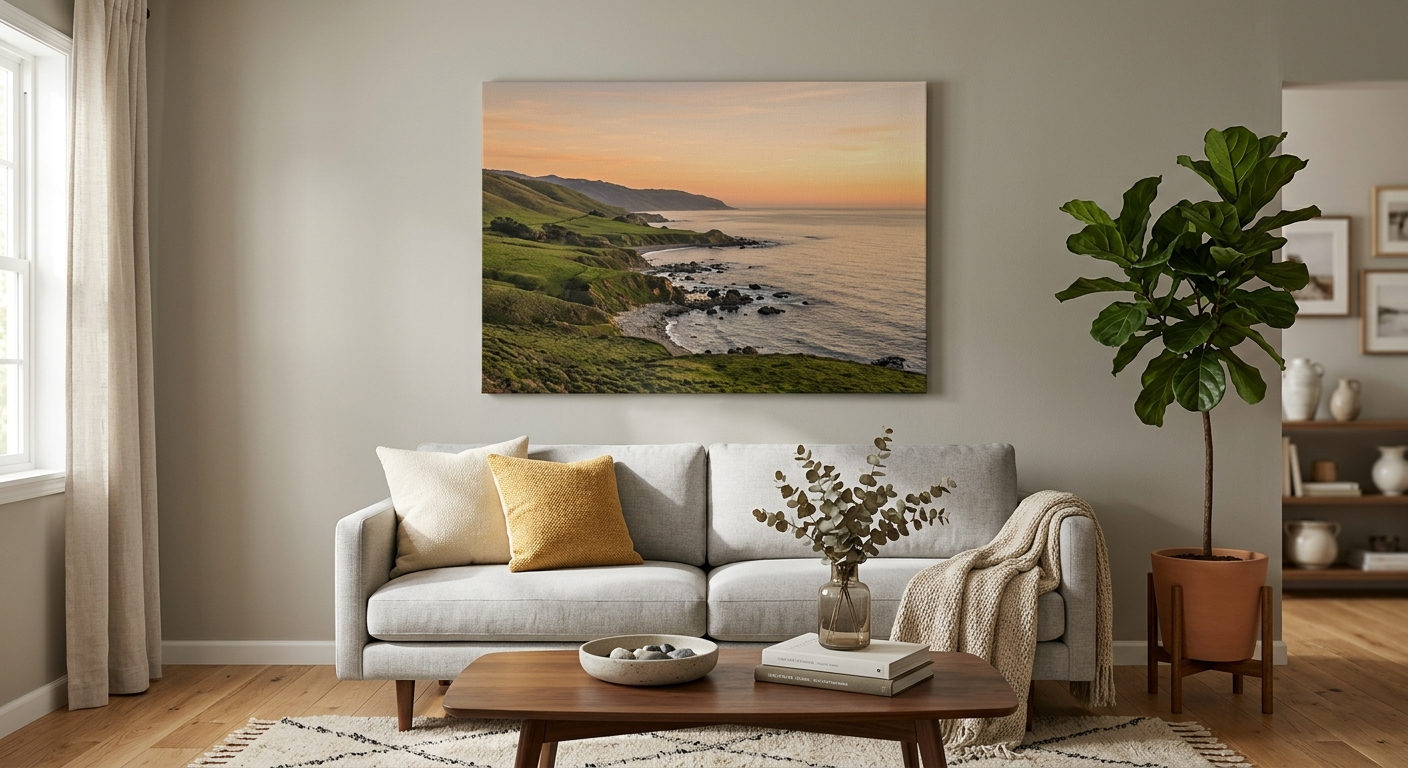
- The 60-75% Rule: A single statement piece or grouped arrangement above furniture often looks balanced when it covers roughly 60% to 75% of the furniture width. An 80-inch sofa, for example, may work well with artwork or an arrangement around 50 to 60 inches wide.
- Eye-Level Hanging Standard: A common gallery reference is to place the center of the artwork around 57 to 60 inches from the floor. You can adjust this depending on ceiling height, furniture placement, and how the room is used.
- Planning a Gallery Wall: When using several pieces together, spacing matters almost as much as the prints themselves. Keeping frames roughly 2 to 3 inches apart can help the collection read as one arrangement rather than a group of unrelated photographs.
Before drilling holes, try outlining the intended dimensions on the wall with painter’s tape. It is a simple way to see whether a planned print feels too small, too large, or just right for the space.
Achieving the Gallery Look: Framing and Finishing
The photograph itself is important, but presentation has a major influence on how finished the piece feels. Framing, matting, glazing, and edge treatment can turn the same image into very different pieces of wall art.
For a more polished result, consider these finishing options:
- Floating Frames: With framed canvas, a small gap between the canvas edge and surrounding frame creates the appearance that the artwork is floating inside the frame. It also keeps the full face of the photograph visible.
- Mat Board Margins: For framed fine art paper prints, a mat creates visual breathing room between the image and frame. Lumaprints uses a 4-ply, acid-free white mat with a beveled opening, with different margin widths available depending on the print size.
- Protective Glazing: Framed fine art paper prints use clear acrylic rather than standard glass. This helps protect the print from dust and handling while being lighter and less vulnerable to breakage during shipping.
Think about the photograph before choosing a finish. A quiet black-and-white portrait may benefit from a generous mat and simple frame, while a colorful landscape may look better when allowed to fill the canvas without additional visual elements competing with it.
Why Giclée Printing Makes Photos Gallery-Worthy
Printing methods can produce noticeably different results, particularly when photographs contain subtle gradients, shadow detail, skin tones, or areas of very similar color.
Lumaprints uses giclée printing for its canvas and fine art paper product lines, with eco-solvent printing for canvas and aqueous pigment printing for fine art paper. These printing methods are intended to reproduce fine detail and smooth tonal transitions while working with materials designed for long-term display.
For photographers, this matters because a good print should preserve the character of the image rather than making subtle detail disappear. Deep shadows should still show texture, skin tones should remain natural, and gradual changes in skies or backgrounds should not become distracting bands of color.
Lumaprints states that its canvas products carry a lifetime guarantee and that the materials are designed for long-term indoor display. As with any artwork or photograph, actual longevity can also depend on conditions such as direct sunlight, humidity, and how the print is handled over time.
How to Order Your Custom Photo Wall Art Step by Step
Once the photograph is prepared, ordering the print becomes much simpler. Before uploading anything, keep the original high-resolution file nearby and decide roughly where the finished piece will hang.
Here is the basic process:
- Select Your Image File: Choose the original high-resolution photograph whenever possible. Avoid screenshots or images downloaded from social media.
- Choose Your Material: Decide whether the image works best on canvas, framed canvas, fine art paper, framed fine art paper, metal, or another available format.
- Upload and Crop: Upload the image and carefully check how the crop changes at the size you selected. Pay special attention to faces and important details close to the edges.
- Select Frame and Hanging Options: Choose a frame or finishing style that works with both the image and the room where it will be displayed.
- Review the Preview and Order: Check the crop, orientation, size, and any resolution warning before submitting the order. A minute spent reviewing these details can prevent disappointment when the finished print arrives.
If you are unsure between two sizes, go back to the wall measurement rather than choosing based only on what looks right on your computer screen.
Choose Lumaprints for Your Next Photo Wall Art Project
A personal photograph deserves the same care you would give any artwork you plan to display prominently. The image may be a wedding portrait, a once-in-a-lifetime trip, a favorite landscape, or a simple family moment that means something to you.
Lumaprints offers canvas, framed canvas, fine art paper, framed fine art paper, metal, and other printing options so you can match the photograph to the style of your room.
Its current product options include giclée printing for selected media, solid wood construction for canvas and framing products, and production in the USA.
Rather than choosing a format only because it is popular, think about the image first. Ask yourself whether you want texture, fine detail, a traditional framed presentation, or something more modern. The best result is usually the one where the photograph, material, size, and room all feel like they belong together.
Frequently Asked Questions
What resolution do I need for photo wall art?
Lumaprints recommends preparing images around 200 to 300 DPI at the intended print size when possible. The actual pixel dimensions you need depend on how large you plan to print. For example, a 16 x 20 canvas at 200 DPI would require roughly 3200 x 4000 pixels, while the same size at 300 DPI would be around 4800 x 6000 pixels.
What is the best material for photo wall art?
It depends on the photograph and the look you want. Canvas adds visible texture and works well for portraits and landscapes. Fine art paper can preserve very fine detail, especially when framed, while metal can give colorful photographs a brighter, more contemporary appearance.
Can I turn phone photos into wall art?
Yes. Many recent smartphones produce files large enough for good-quality prints, especially when the photo was taken in good light. Use the original image from your camera roll rather than a version downloaded from social media or a messaging app.
How large should I make my photo wall art?
Measure the wall and any furniture below it first. For artwork hanging above a sofa, bed, or console, a finished width around 60% to 75% of the furniture width is a useful starting point, although the room and arrangement may call for something different.
How can I make personal photos look more gallery-worthy?
Start with a strong original file, prepare it at the correct resolution, check the crop carefully, and choose a material that suits the image. Framing, matting, print size, and placement also make a noticeable difference. A good gallery look usually comes from several thoughtful choices rather than one special effect.
Bring Your Favorite Photos Off the Screen and Onto the Wall
The photographs that matter most to you should not have to stay buried in a phone gallery. A well-prepared image can become part of the room you see every day, whether it is a family portrait in the hallway, a travel photograph above the sofa, or a quiet landscape in the bedroom.
If you want to turn photos into wall art, begin with the best original file you have, check its resolution, decide where the finished piece will hang, and choose the material and size around that space. Those few decisions will do more for the finished result than simply choosing the largest available print.
When you are ready, choose the Lumaprints format that fits your photograph, upload the original file, review the crop carefully, and create photo wall art that gives the memory a permanent place in your home. Need help choosing the right size, material, or finish? Contact Lumaprints today and let our team help you turn your favorite photo into a finished piece you will be proud to display.