Metal prints offer a different look from canvas or fine art paper, especially when you want strong color, sharp detail, and a smooth modern finish. But how are metal prints made, and what happens between uploading your image and receiving the finished piece?
In this product spotlight, we go behind the scenes at Lumaprints to look at the metal printing process, from preparing the image file and transfer paper to dye sublimation, finishing, hanging options, and shipping. If you have been considering metal for photography or artwork, understanding the process can help you decide whether it is the right material for your image.
If you prefer reading to watching, we’ve got you. Read on for the written version of the webinar, or jump to any topic below.
File Requirements
To create a beautiful metal print, it all begins with the image file. Ensuring your image meets the recommended specifications gives the printing process better information to work with.
Lumaprints recommends files with a resolution of 300 DPI, an Adobe RGB color profile, and JPG, JPEG, or PNG file formats. Check the dimensions of the original image before enlarging it, especially if you plan to order a larger metal print.
Adobe also explains how pixel dimensions and image resolution affect the quality of printed output, which can be useful when preparing your file for print.
Adobe guide to printed image resolution
Please note that approximately 1/8″ to 1/4″ may be cropped during the production process, so avoid placing important details too close to the edge of the file.
To help visualize the final result and check for pixelation or fuzziness, we’ve also discussed the “1-inch rule.” Using a physical ruler to compare the image size shown in your editing software can give you a better idea of how details may appear in the finished print.

A Peek Behind the Metal Print Process
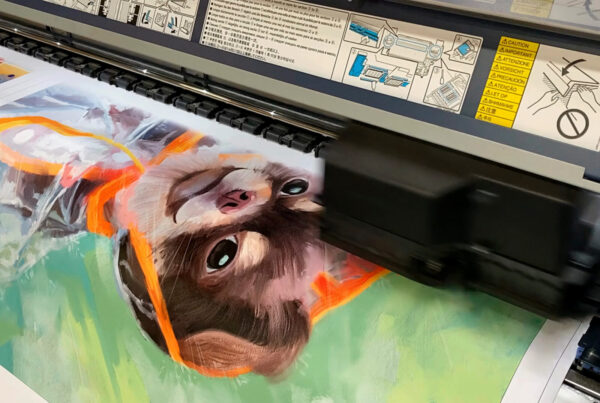
So, how are metal prints made at Lumaprints? The production process uses dye sublimation, where heat and pressure transfer the image onto coated aluminum.
Before the transfer begins, both the metal surface and transfer paper need to be clean. Even a small piece of dust or debris can affect the finished surface, so preparation is an important part of the metal printing process.
The image is printed onto transfer paper and carefully aligned with the metal panel. Keeping the two pieces in position helps prevent movement during production. They are then placed into a heat transfer machine, where controlled heat and pressure allow the image to transfer onto the coated surface.
The finished result is a smooth metal print with the color and detail of the original image reproduced on the panel.
Want to see the process instead of only reading about it? Watch the metal print production demo.
Variations
Metal prints are available in different finishes, and the choice can affect how the image looks.
Glossy Silver works particularly well for images where the metallic surface can become part of the presentation. Black-and-white photography, metallic subjects, and certain high-contrast images can take on a distinctive appearance with this finish.
The Versatility of Metal Prints
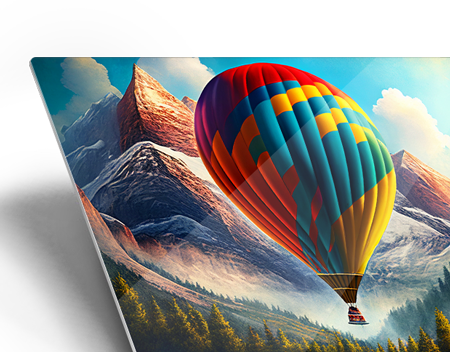
Metal prints work particularly well with vibrant photographs and artwork. Images with strong contrast, bright colors, city lights, landscapes, and saturated photography can take advantage of the smooth surface and modern presentation.
They can also work in different environments. Metal prints may be used in homes, offices, hospitality spaces, retail locations, or other interiors where a clean contemporary look fits the room.
That versatility is one reason it helps to understand the metal printing process before choosing the material. The photograph or artwork, finish, size, and room should work together rather than choosing metal simply because it looks different from other print options.
Custom Sizes and Future Plans
At the time the original webinar was recorded, Lumaprints offered set metal print sizes and discussed custom sizing as a future option. Because product sizes and features can change, check the current Lumaprints options before planning a project around a specific custom dimension.
The webinar also discussed testing a three-point security installation option for metal prints. This feature was still in development at the time of recording, so customers who need specialized mounting should confirm the latest options with Lumaprints before ordering.
See the Metal Printing Process for Yourself
Metal prints can give photography and artwork a clean, modern presentation, but the finished result starts well before the image reaches the wall. File preparation, surface cleanliness, alignment, dye sublimation, finishing, mounting, and packaging all play a part.
If you have been wondering how metal prints are made, seeing those steps makes it easier to understand why the original image file and finishing choices matter.
Watch Product Spotlight – Metal Prints – Lumaprints Learning Series 20 for the complete behind-the-scenes discussion and production demonstration.
All previous and upcoming webinar videos are available on the Lumaprints YouTube Channel.
Frequently Asked Questions
How are metal prints made?
Metal prints are produced by transferring an image onto specially coated aluminum using heat and pressure through a dye-sublimation process.
What resolution should I use for a metal print?
Lumaprints recommends preparing your image at 300 DPI for the intended print size whenever possible.
What is the difference between glossy silver and glossy white metal?
Glossy silver allows the metallic surface to influence the appearance of the image, while glossy white provides a white base that better maintains the original colors.
Are metal prints suitable for colorful photography?
Yes. Images with strong color, contrast, and detail can work particularly well on metal, although the best finish depends on the photograph and the appearance you want.
How are metal prints prepared for shipping?
Lumaprints uses protective packaging designed to suspend the print inside the package and reduce direct pressure on vulnerable corners during transit.

Glossy White provides a white base beneath the image, helping maintain the original color appearance. This makes it a versatile choice for photographs and artwork where accurate, vibrant color is the priority.

Choosing between them comes down to the image itself and the look you want on the wall.
Hanging and Shipping Options
When it comes to displaying a metal print, Lumaprints offers several hanging options.
A metal easel works well for smaller prints that will be displayed on a desk, shelf, or other furnishing.

The inset frame provides another option for wall display. Its design allows the print to sit away from the wall while keeping the mounting hardware mostly out of sight.

For a more visible mounting style, stainless steel mounting posts are available in 0.75-inch and 1-inch diameters. These provide a secure way to display the panel while making the hardware part of the overall presentation.

Shipping also needs special attention because the corners of a metal print can be vulnerable during transit. Lumaprints uses packaging designed to keep the print suspended so the corners do not sit directly against the outer packaging.

The Versatility of Metal Prints
Metal prints work particularly well with vibrant photographs and artwork. Images with strong contrast, bright colors, city lights, landscapes, and saturated photography can take advantage of the smooth surface and modern presentation.
They can also work in different environments. Metal prints may be used in homes, offices, hospitality spaces, retail locations, or other interiors where a clean contemporary look fits the room.
That versatility is one reason it helps to understand the metal printing process before choosing the material. The photograph or artwork, finish, size, and room should work together rather than choosing metal simply because it looks different from other print options.
Custom Sizes and Future Plans
At the time the original webinar was recorded, Lumaprints offered set metal print sizes and discussed custom sizing as a future option. Because product sizes and features can change, check the current Lumaprints options before planning a project around a specific custom dimension.
The webinar also discussed testing a three-point security installation option for metal prints. This feature was still in development at the time of recording, so customers who need specialized mounting should confirm the latest options with Lumaprints before ordering.
See the Metal Printing Process for Yourself
Metal prints can give photography and artwork a clean, modern presentation, but the finished result starts well before the image reaches the wall. File preparation, surface cleanliness, alignment, dye sublimation, finishing, mounting, and packaging all play a part.
If you have been wondering how metal prints are made, seeing those steps makes it easier to understand why the original image file and finishing choices matter.
Watch Product Spotlight – Metal Prints – Lumaprints Learning Series 20 for the complete behind-the-scenes discussion and production demonstration.
All previous and upcoming webinar videos are available on the Lumaprints YouTube Channel.
Frequently Asked Questions
How are metal prints made?
Metal prints are produced by transferring an image onto specially coated aluminum using heat and pressure through a dye-sublimation process.
What resolution should I use for a metal print?
Lumaprints recommends preparing your image at 300 DPI for the intended print size whenever possible.
What is the difference between glossy silver and glossy white metal?
Glossy silver allows the metallic surface to influence the appearance of the image, while glossy white provides a white base that better maintains the original colors.
Are metal prints suitable for colorful photography?
Yes. Images with strong color, contrast, and detail can work particularly well on metal, although the best finish depends on the photograph and the appearance you want.
How are metal prints prepared for shipping?
Lumaprints uses protective packaging designed to suspend the print inside the package and reduce direct pressure on vulnerable corners during transit.