In this webinar, we offer tips for ordering on Lumaprints. With the new website taking root, we understand that customers would like to see visuals of certain processes, so this webinar is just that! You can see in real-time what it is like to order multiple products and see the capabilities of our editing tool.
If you like reading more than watching, we’ve got you. Read on for all the instructions. You can also jump to any topic you want from the list below.
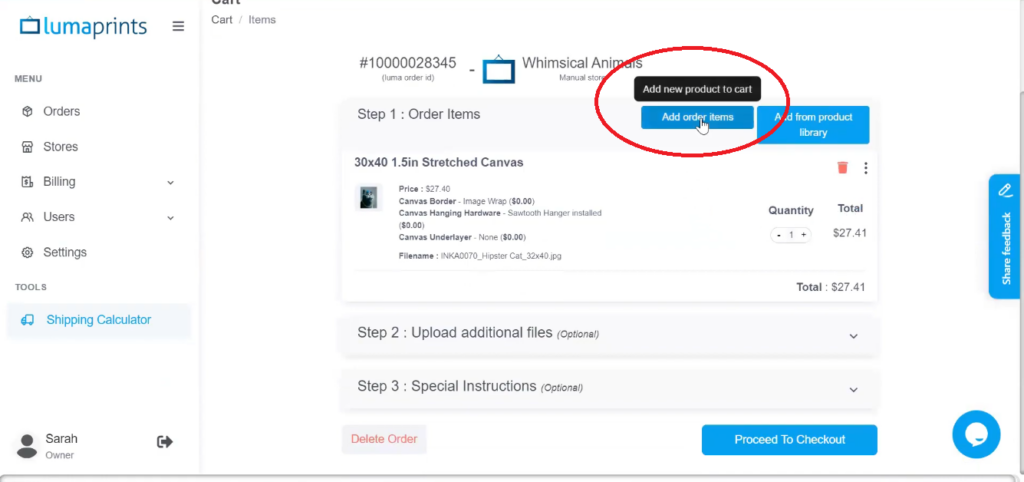
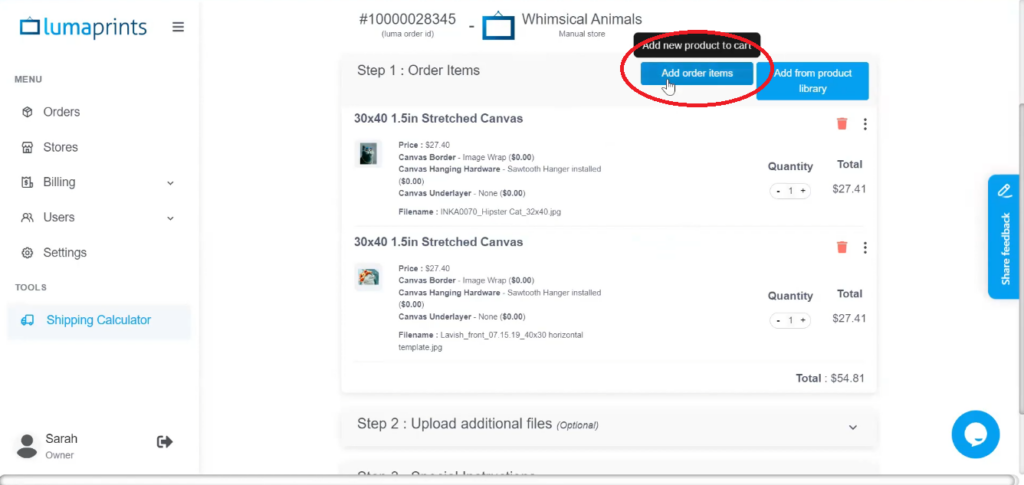
Add Order Items Button
After going through the whole process of adding a product to your order (See article [WEBINAR] Processing an Order with Lumaprints for more information on how to process an order), you can add more products to your order by going to your cart and clicking the Add order items button.
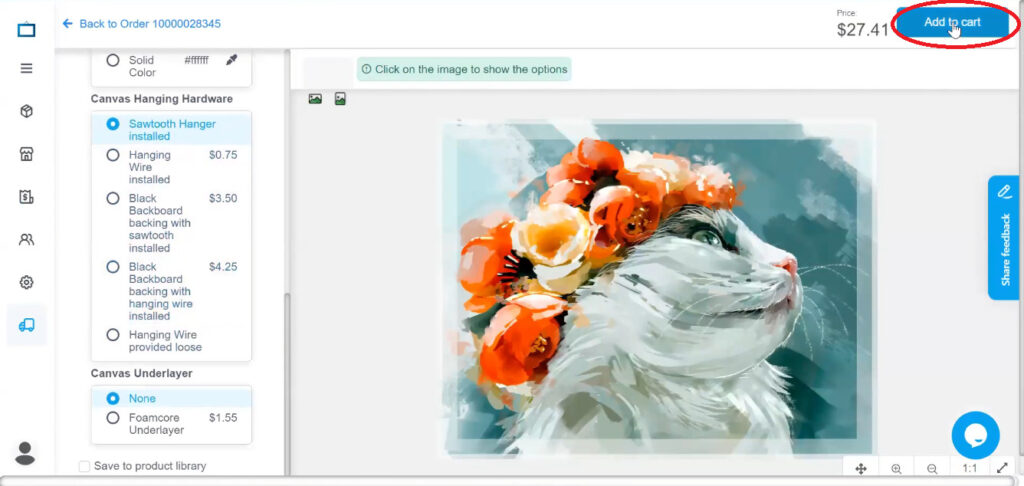
After clicking the Add Order items button, you can add the product to the order by uploading the image, choosing the size, and other order options. (See article [WEBINAR] Processing an Order with Lumaprints for a detailed tutorial on how to add an order.)
Once you’re done setting up the product you’d like to add, click Add to Cart to finalize.
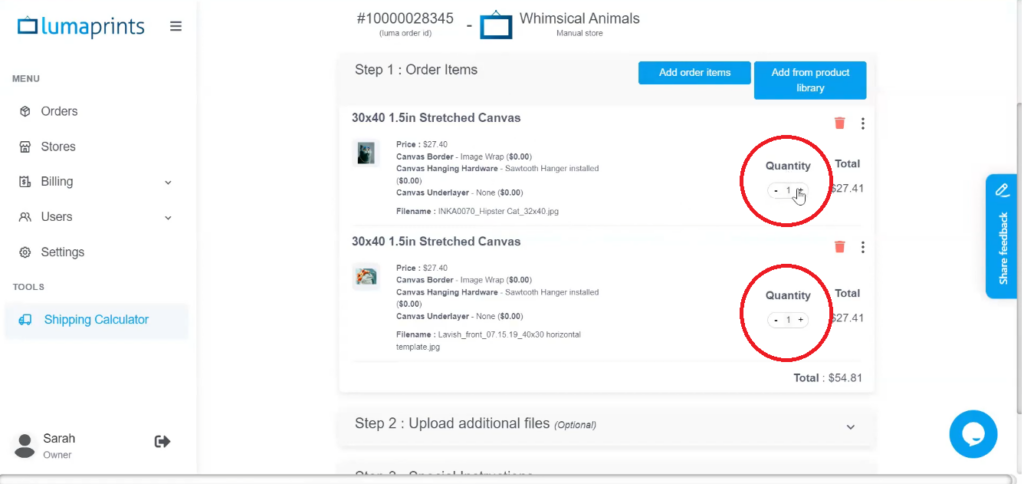
Once the Add to Cart button is clicked, you can see that the added product is now included in your cart. You can increase and decrease the quantity of a product by clicking the + and – sign beside the order.
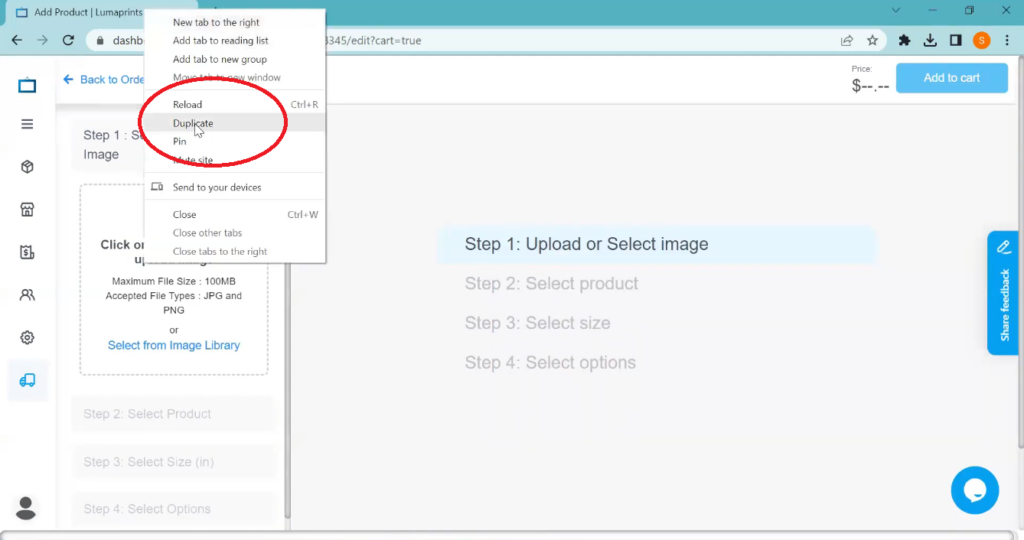
Duplicate Tab Method
If you’re adding multiple products to an order and don’t like to go through the process of adding an order and getting redirected to your checkout page repeatedly, you can also use the duplicate tab method.
First, click Add order items from your checkout page.
Once the Add Product page appears, you can right-click the tab and duplicate it depending on how many products you need to add to your cart. You can set up the product on each tab and click Add to Cart to finalize.
Deleting a Product from Cart
To delete a product from your cart, go to the checkout page and click the red trash bin icon next to the order item.

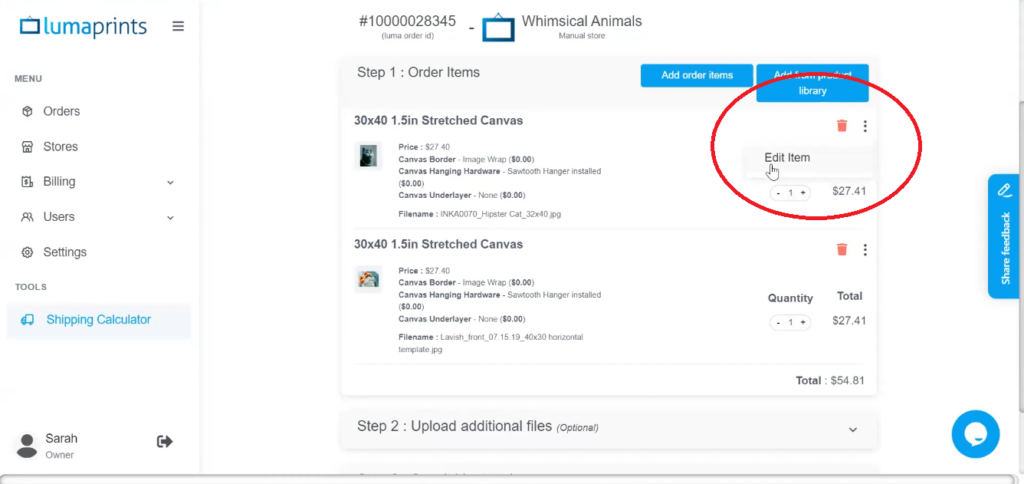
Editing Product from Cart
To edit or update a product from your cart, you can click the three vertical dots beside the product and click Edit Item.
Editing Tools
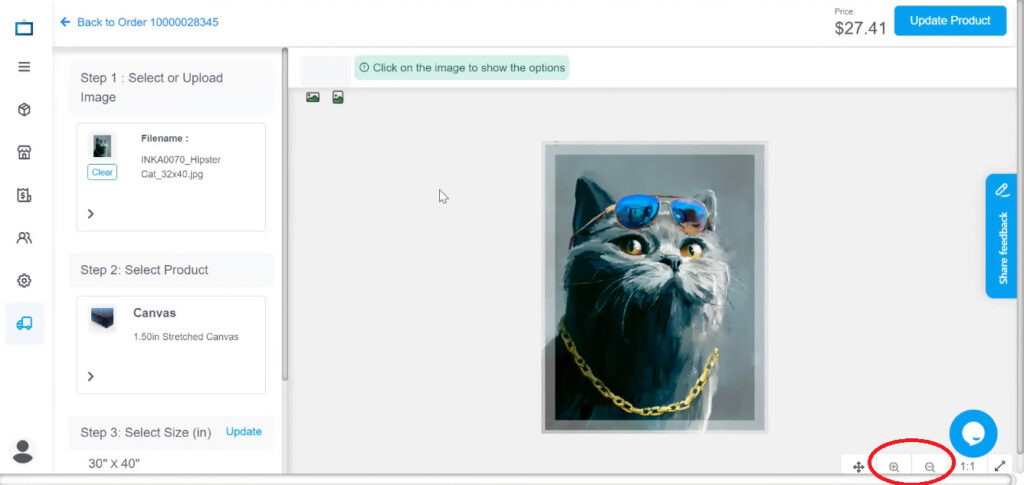
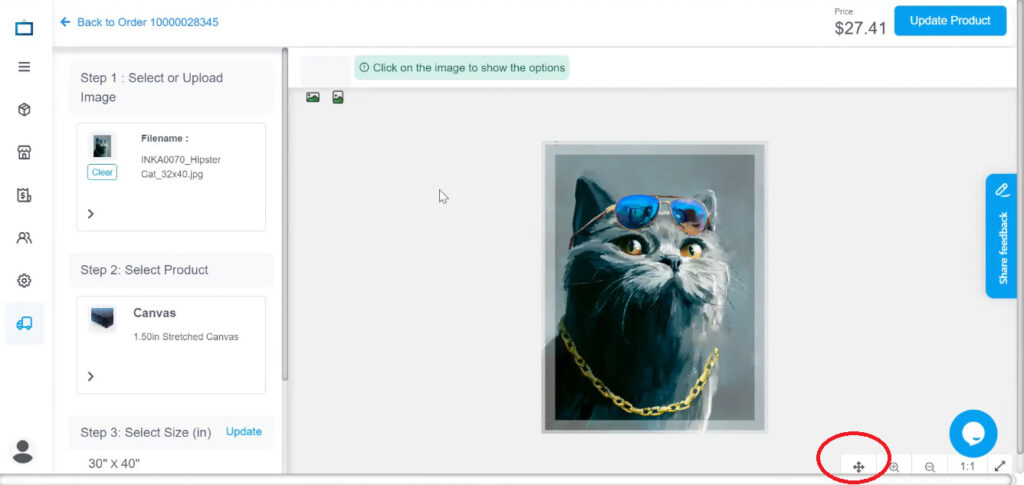
The new Lumaprints ordering site also has an editing tool to help you fine-tune your images.
Navigation
- Zooming In and Out. You can zoom in and out of your image using the magnifying glass icon.
- Move Tool. Navigate and move the image within the editing space using the move tool.
- Getting up close to the image. You can click the 1:1 icon to zoom in on the image.
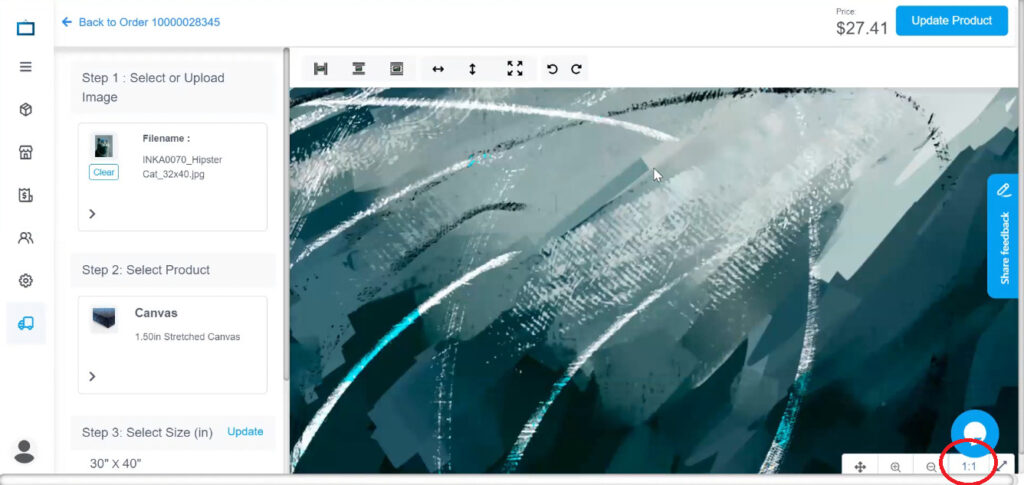
- Diagonal Arrow. Click the diagonal arrow icon to zoom the image out.
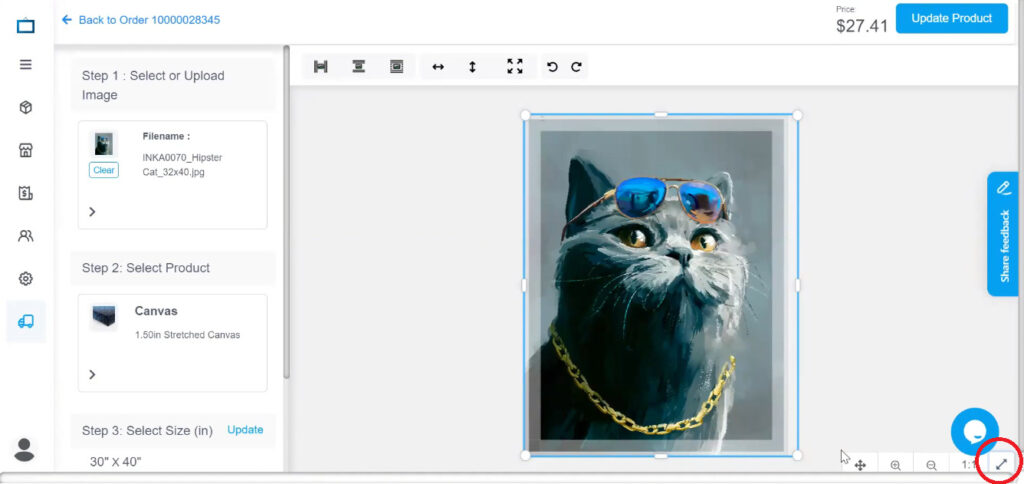
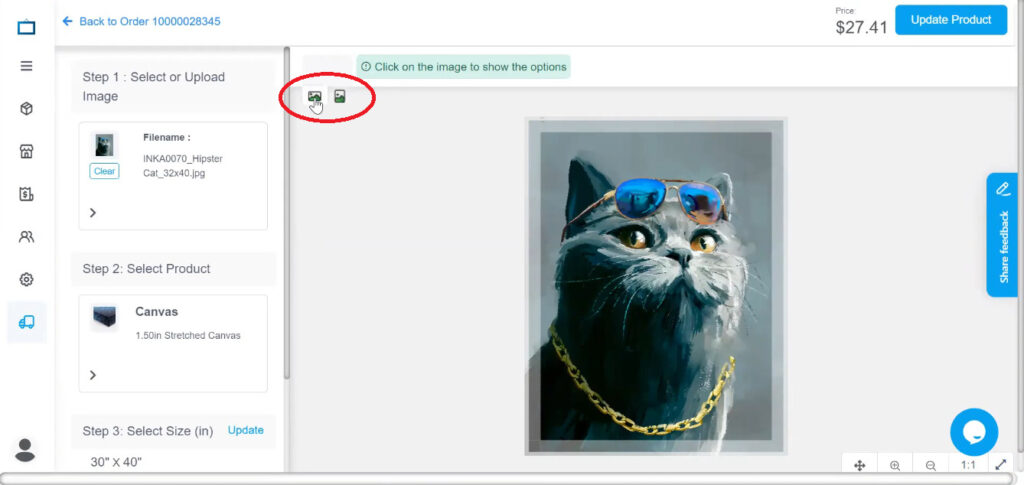
Image Editing
Orientation
On the upper part of an image, you will see two icons that let you change the orientation of your image from horizontal to vertical and vice versa, depending on what the order needs.
Centering
Once you change the orientation of your product, you can also access tools that can center your image easily. After clicking the image, additional tools will appear above.
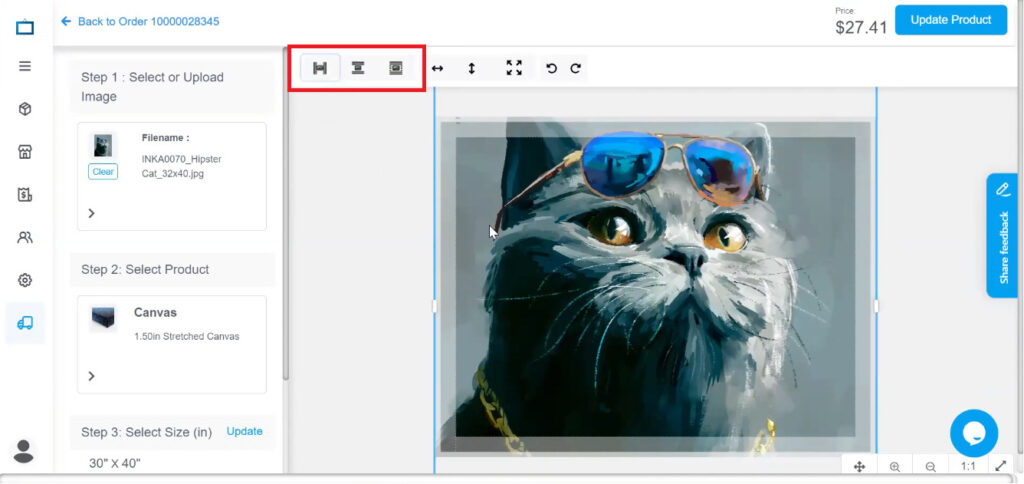
- Center X button allows you to center the image horizontally or based on the x-axis.
- Center Y button allows you to center the image vertically or based on the y-axis.
- Center X & Y button allows you to center the image vertically and horizontally or based on both the y-axis and x-axis.
Fitting your Image to Size
The next set of tools allows you to skew your image and lets it fit to size.
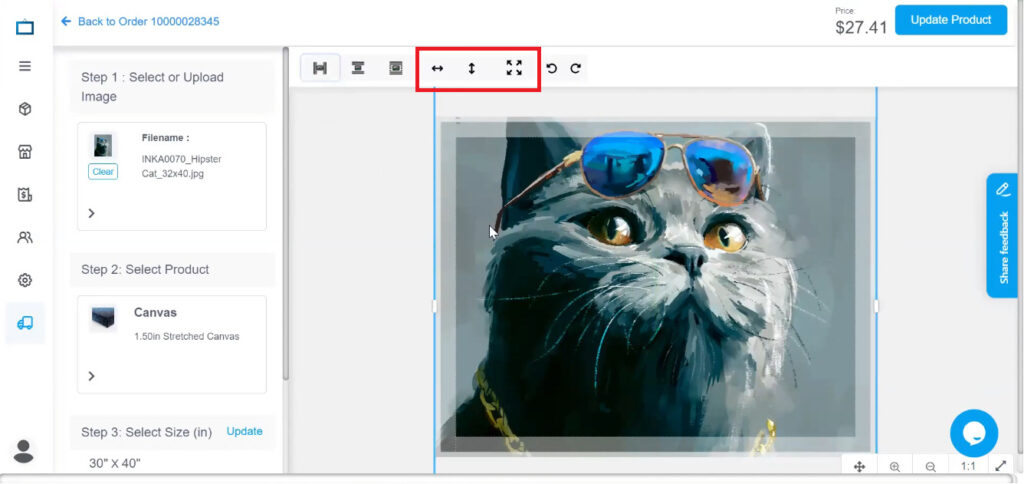
- Fit to Width
- Fit to Height
- Fit to Workspace
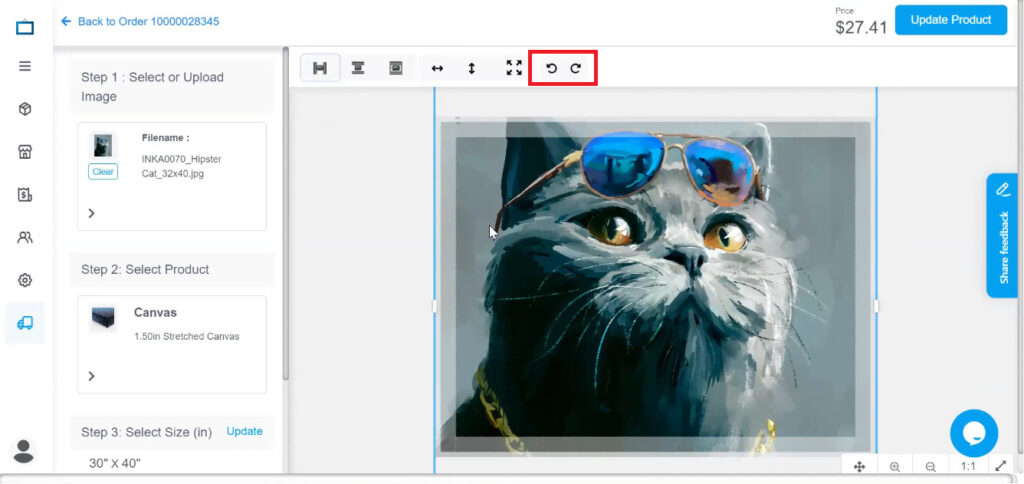
Rotation
You also have the option to rotate your image at a 90-degree angle and vice-versa.
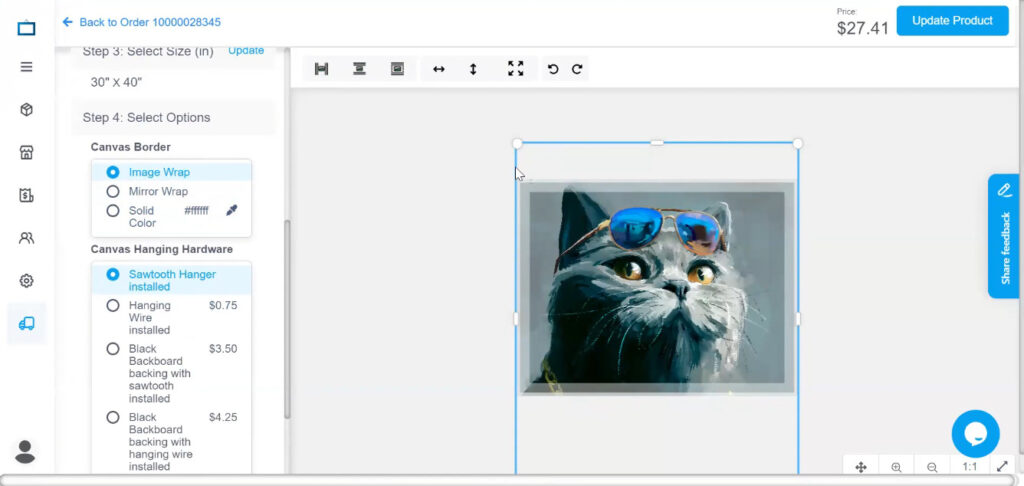
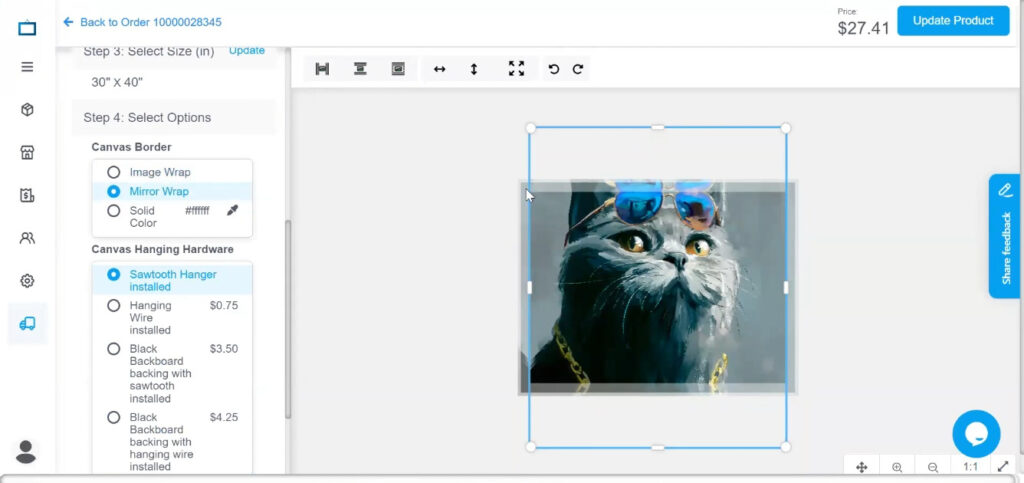
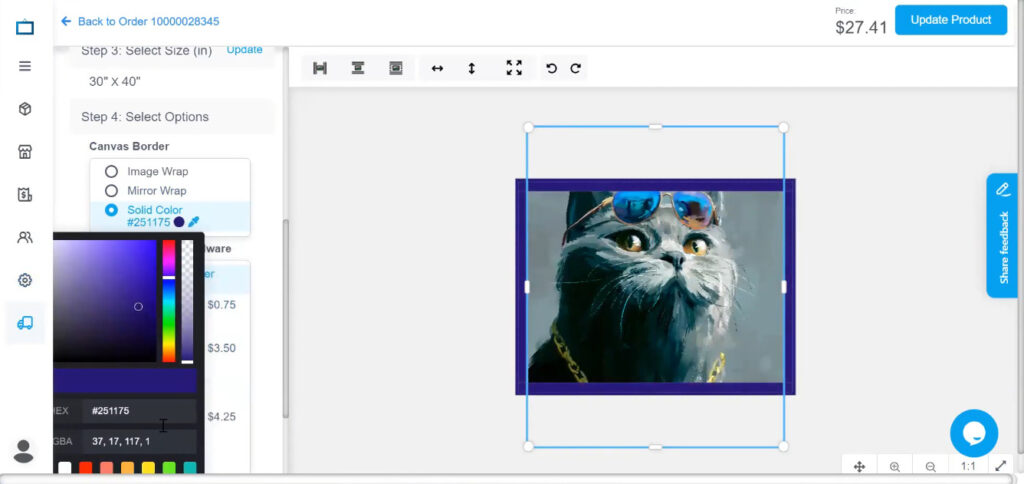
Canvas Border Options
During step 4 of adding or editing a product, you can choose a border for your image, and the editor will show you a preview of what the border will look like.
- Image Wrap – A part of your image will go into the bleeds, as shown on the faded white border on the image below.
- Mirror Wrap – If you’d like to keep everything on your image within the front side of the canvas, you can choose Mirror Wrap, as it mirrors what is shown on the front side of your canvas.
- Solid Color – You can choose a solid color as your canvas border. You can also use the color dropper tool to change the color of your wrap.
Q&A Session
- I recently connected my Etsy store to Lumaprints. Can you explain the process for managing personalized or customized Etsy orders with a connected shop?
- When processing custom or personalized orders with a connected shop, we recommend using Manual Order Submission to prevent the orders from automatically processing (if you previously chose Automatic Order Submission).
To change this, go to your Stores on the left side of the dashboard and click Store Settings beside the connected store you want to modify the settings.

Scroll down to see the Order Submission automation section in your settings. Click Manual to toggle off automatic order submissions.

- How close are you to making multiple products in a store? (An order including a multiple image like a triptych or diptych)
- Triptych and diptych art will be available on our ordering site by the end of 2023 or early 2024.
Watch this webinar through this link: https://youtu.be/I9IHqsAE8OE?si=2Zo8WVjcW0GfrAzF
All previous and upcoming webinar videos are available on our YouTube channel: https://www.youtube.com/@lumaprints