
Welcome to Lumaprints Webinar 15! In this step-by-step guide, we’ll show you how to use mock-up templates to showcase your artwork on Lumaprints products. Mock-up templates allow you to visualize how your artwork will look before purchasing.
If you like reading more than watching, we’ve got you. Read on for all the instructions. You can also jump to any topic you want from the list below.
Accessing the Mock-up Templates
Working with the Mock-up Templates
Customizing Your Mock-Up’s Background
Accessing Mock-Up Templates
There are Mock-up Templates available for you on our website. Before you begin, make sure you have editing software installed. While Photoshop is the standard, you can use free or low-cost alternatives like Medibang or Clip Studio Art, which support multiple layers and PSD files.
Visit the Lumaprints website at www.lumaprints.com. Click Products on the tab on top and choose the type of product you want to create a mock-up for, such as canvas prints, fine art paper prints, or framed canvas prints.

Scroll down to the bottom of the page to find the “Assets” section.
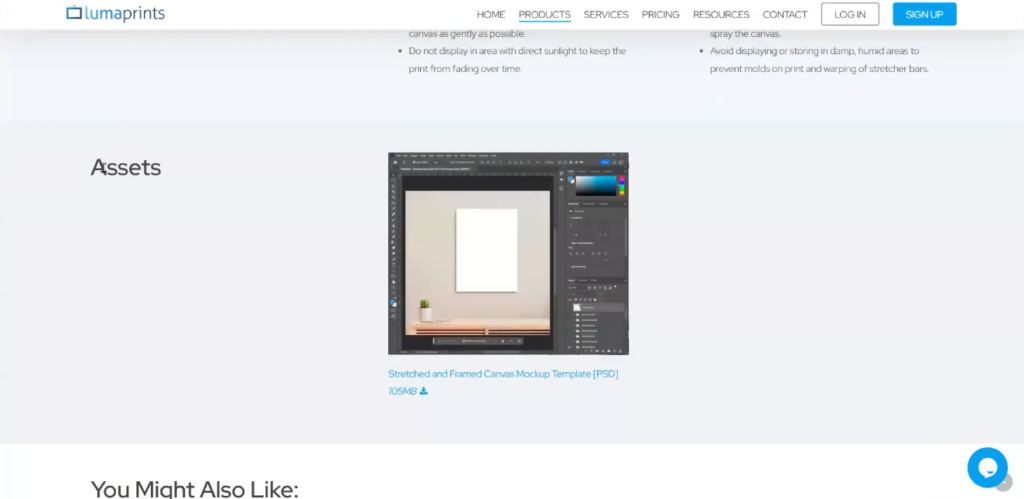
Locate and download the mock-up template for your chosen product type. These templates are available for stretched and framed canvas prints and fine art paper prints.

Working with the Mock-up Templates
Open the downloaded template file. Note that these files may be large and could take some time to open.
Instructions
Inside the template, you’ll find instructions on how to use it. You can navigate the template even without the video tutorial.
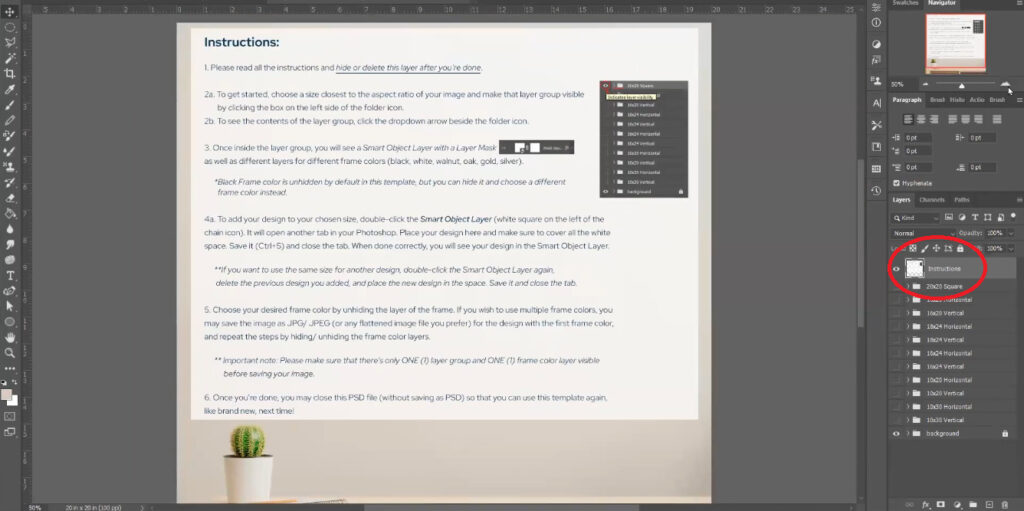
You can hide or toggle irrelevant pages and layers on and off as needed. This functionality is similar to other graphic editing programs.
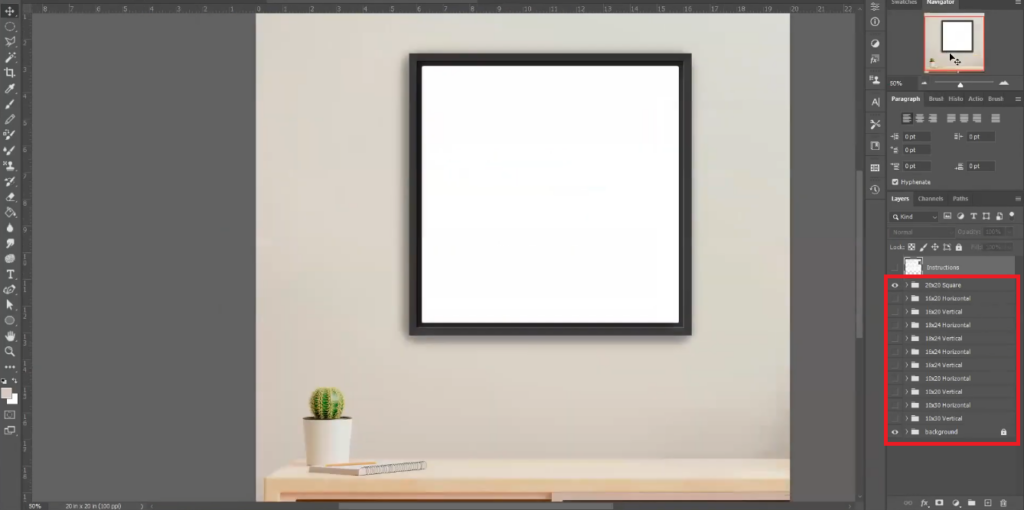
Selecting Size
Select the canvas size that matches your artwork. Popular sizes and ratios are provided, including squares, rectangles, panoramics, and large and small options.
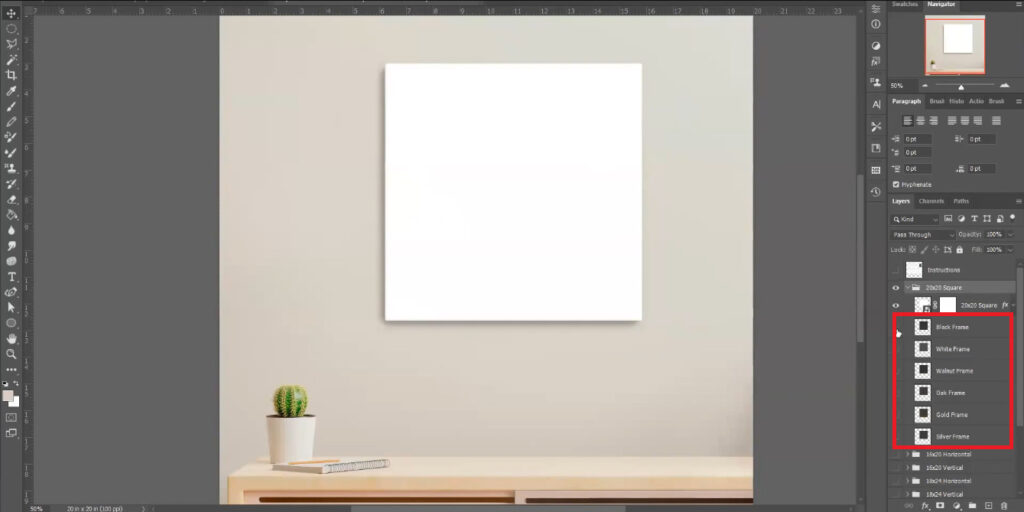
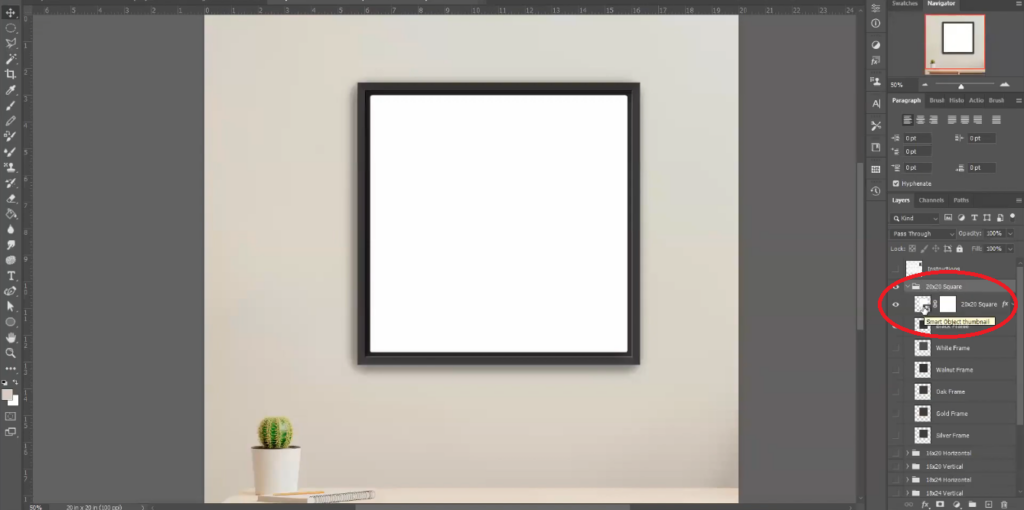
Choosing Frames
Customize your mock-up by toggling features like frames on or off based on your preference. There are many frames to choose from. This allows you to showcase your artwork exactly as you envision it.
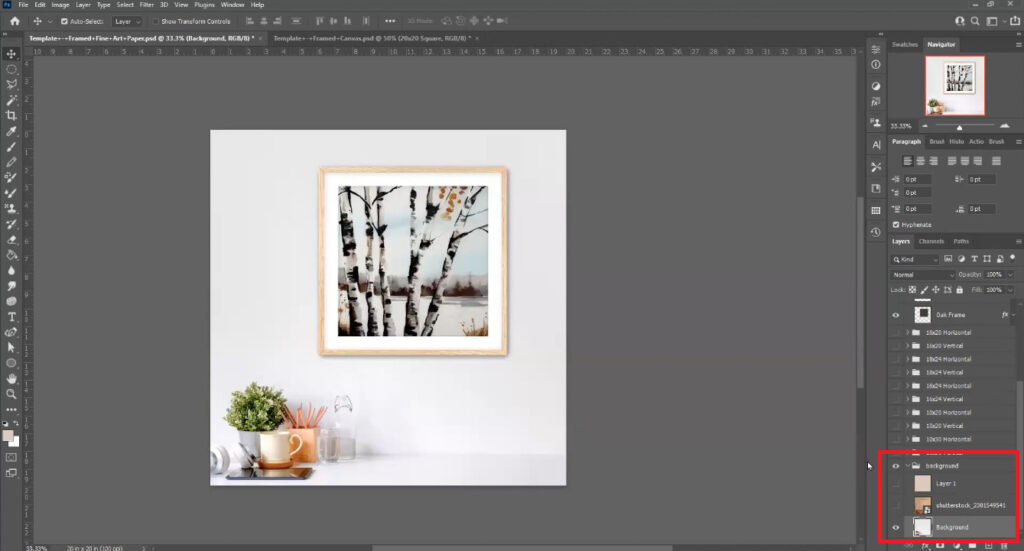
Adding Your Artwork
To add your image to the template, locate the smart object within the chosen canvas size layer.
Double-click on the smart object to open a new page where you can add your artwork.
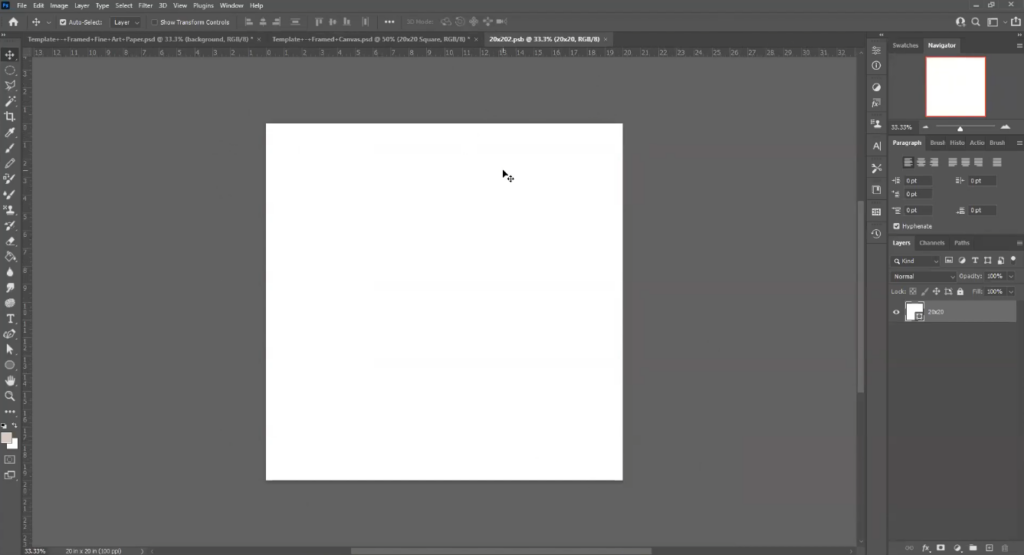
Copy and paste, drag and drop, or use your preferred method to insert your artwork onto the canvas.
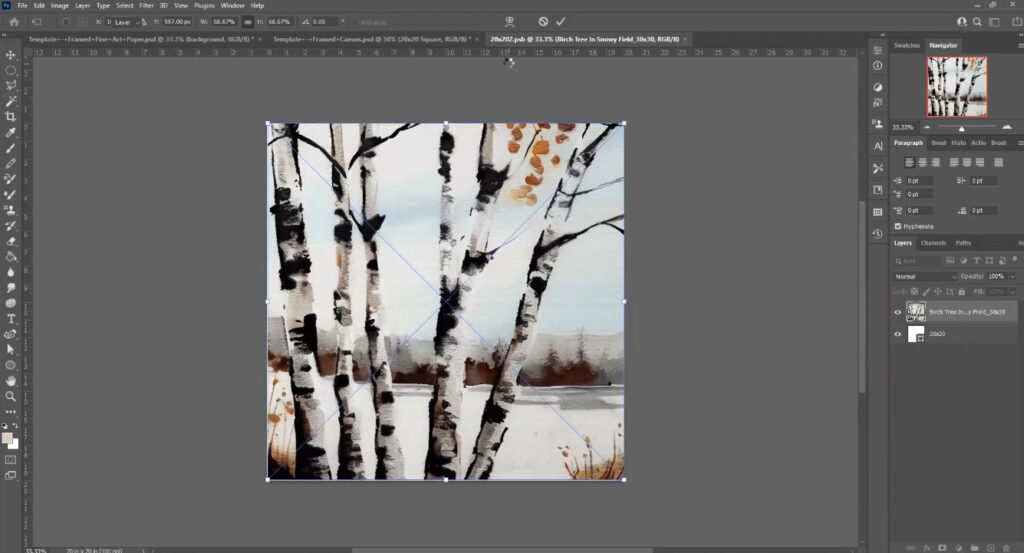
Position your artwork as desired, ensuring it fits within the canvas boundaries.
Saving Your Mock-Up
Save your mock-up by pressing “Ctrl + S” (or “Cmd + S” on Mac) to ensure your image is superimposed onto the canvas.
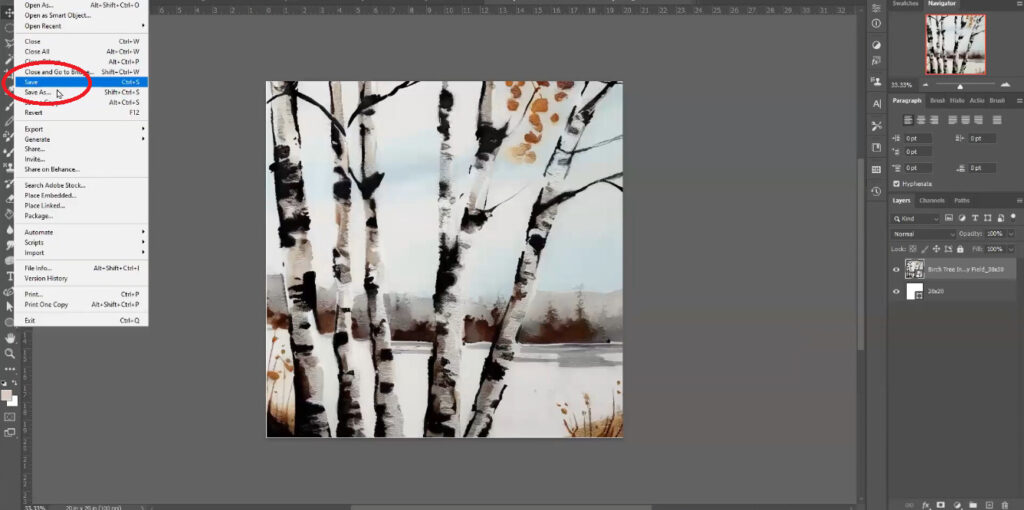
Exit the smart object window. Your artwork will now be visible on the mock-up.
Exporting Your Mock-Up
Export your mock-up as a JPEG or PNG, depending on your needs. PNG is recommended for web use as it preserves image quality.
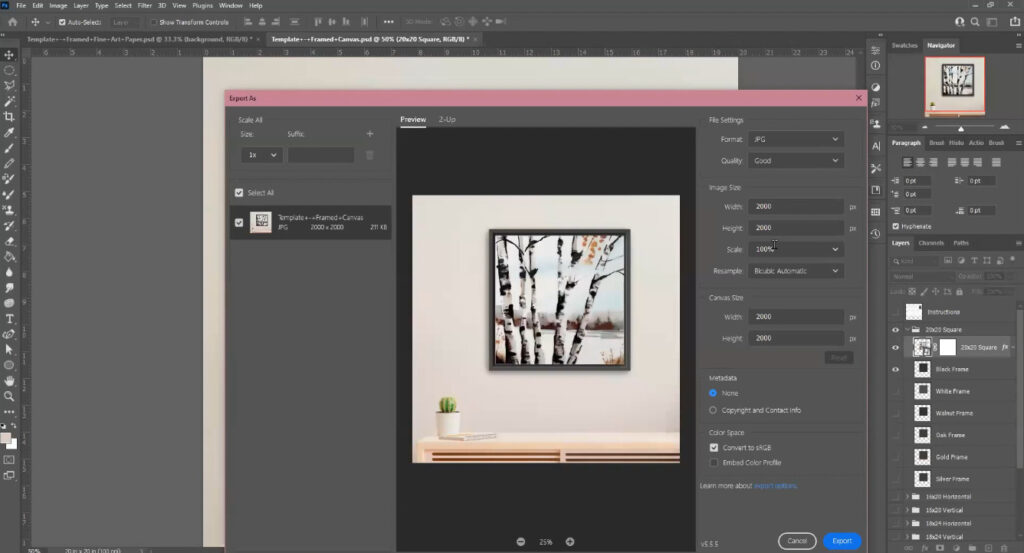
Give your mock-up a title, such as the name of your artwork.
Congratulations! You’ve successfully created a mock-up of your artwork using Lumaprints’ templates. This process should take only a few minutes once you become familiar with it.
Customizing Your Mock-Up’s Background
Feel free to customize backgrounds or explore options to match your artistic vision. Click on the Background folder and toggle on or off to choose the standard pre-added background.
Additional Information
- Perspectives, like showing the sides and edges of canvas prints, can be useful for showcasing thickness. While not a strict requirement, they can enhance your presentation.
- If you don’t have Photoshop, consider free alternatives like Medibang, Gimp or one-time purchase options like Clip Studio Art.
We hope this guide helps you make the most of Lumaprints’ mock-up templates! If you have any questions or need further assistance, don’t hesitate to reach out to Lumaprints’ customer support or the webinar team.
Watch this webinar through this link: https://youtu.be/ymXSHT6YsoA?si=d7ys9Etb8dlnGAc5
All previous and upcoming webinar videos are available on our YouTube channel: https://www.youtube.com/@lumaprints

I would love to start using Lumaprints for canvas and paper prints on my website. Will Lumaprints also include canva for mockup options? I do not have an adobe subscription. I have tried several times in the past and find it is a really hard program to use. Canva is a lot easier. I have been hoping for months this would become an option. I finally decided to ask.
Thank you,
Jeanne
Hi Jeanna,
Thanks for commenting on our post and sharing your feedback! We understand that Canva is more accessible and a user-friendly tool. We’re going to add your request to our pipeline of assets, and we’ll share it with everyone once it is available.
Best,
Lumaprints Marketing