
For our 13th Webinar, Marketing Manager, Sarah, walks you through step-by-step instructions on how to connect your online store to our new Lumaprints ordering site. Whether you use Shopify, Etsy, or ShipStation, you’ll learn how to set up your store and map your products for easy ordering.
If you like reading more than watching, we’ve got you. Read on for all the instructions. You can also jump to any topic you want from the list below.
Log-In Page and Registration
Our new ordering site’s log-in page will look like this.
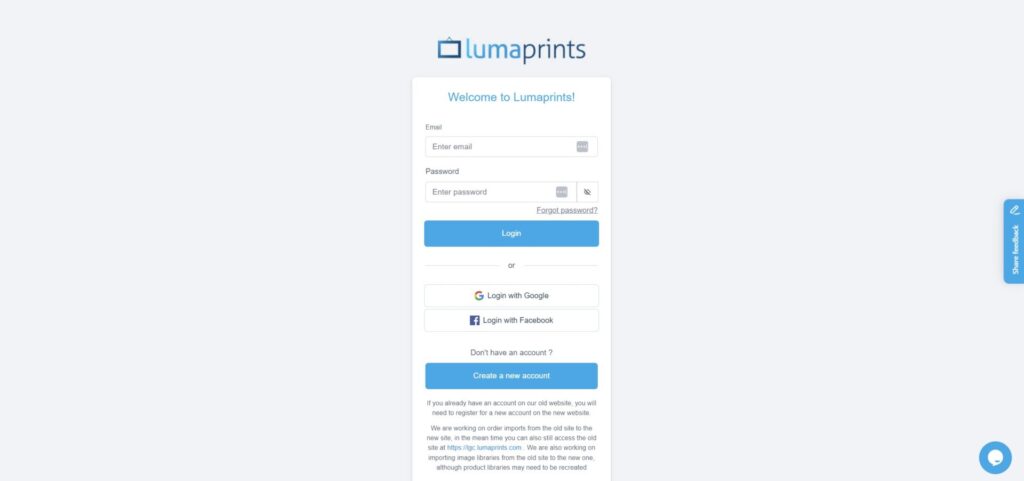
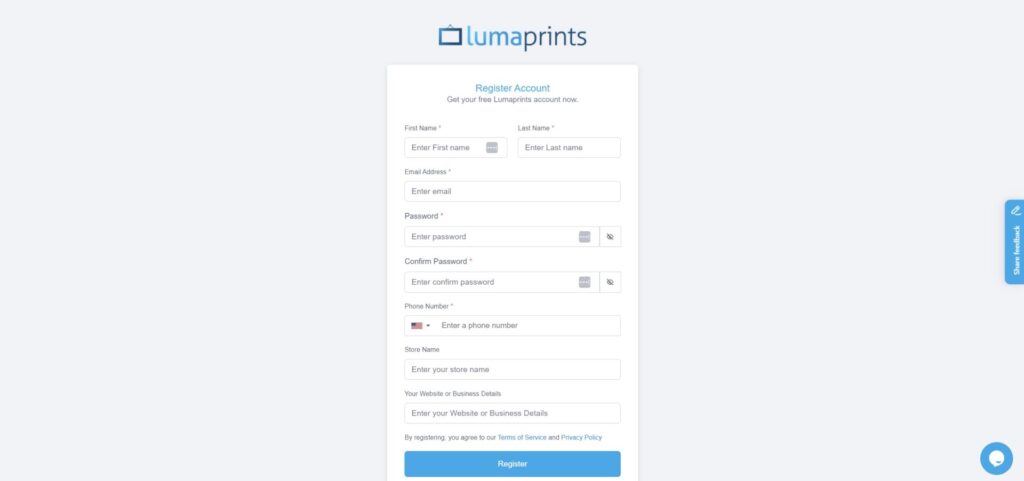
If you don’t have an account even on our current ordering site, you have to create a new account. You can manually input your details or choose to register with your Google or Facebook account.
Direct Shopify Integration
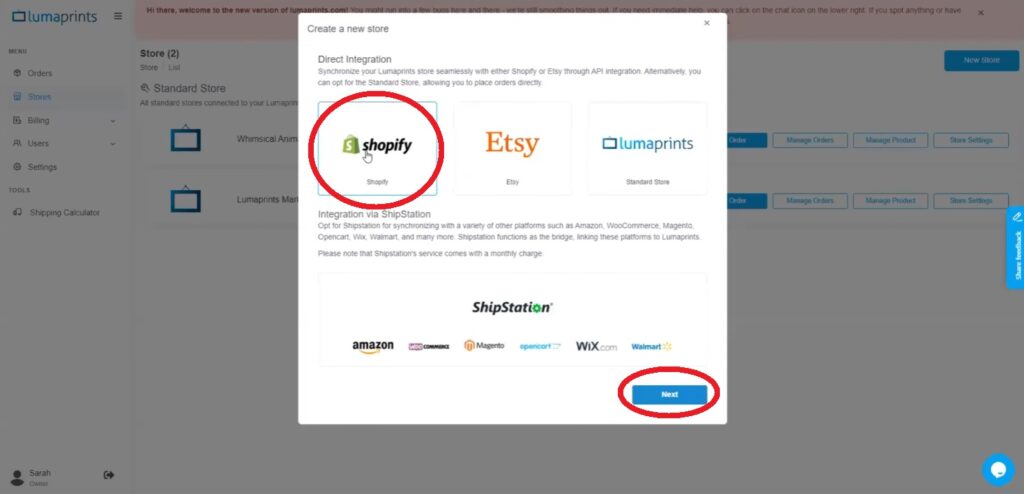
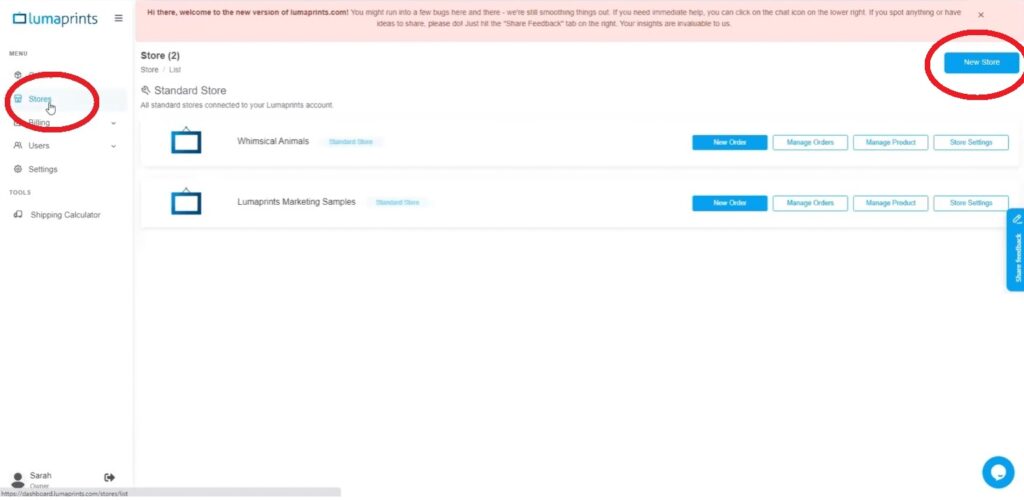
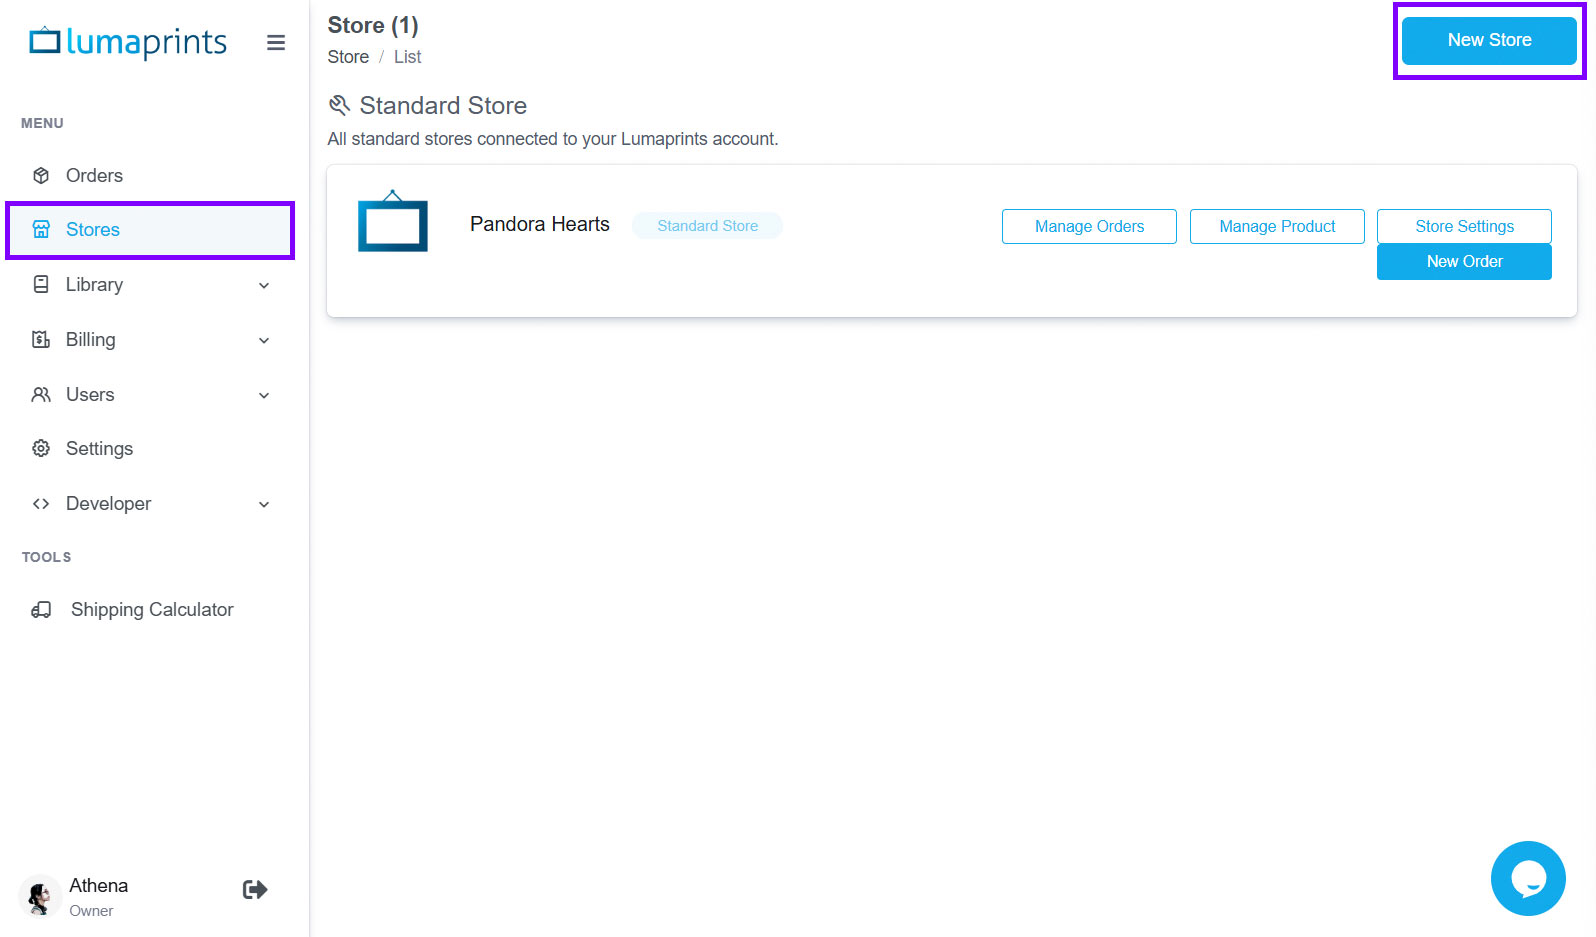
If you wish to add a new store, click Stores on the left side of the dashboard and choose New Store.

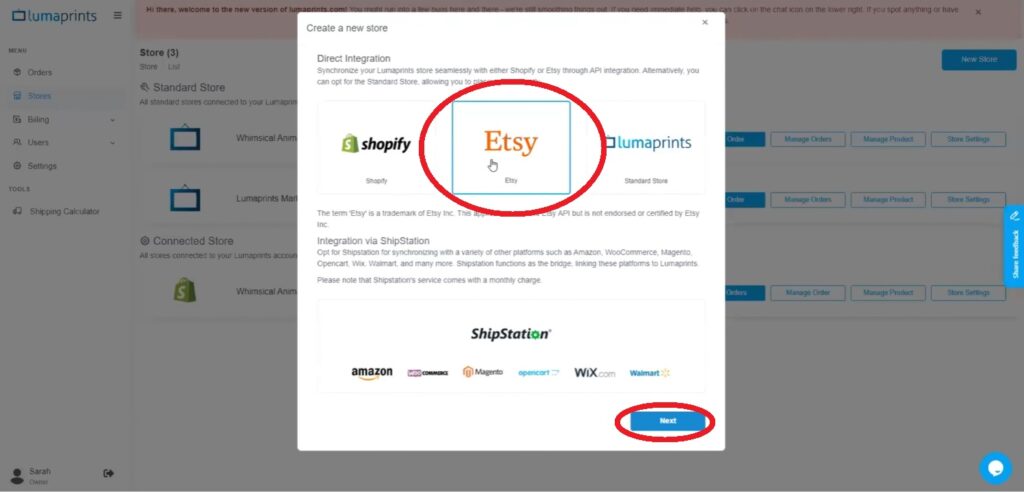
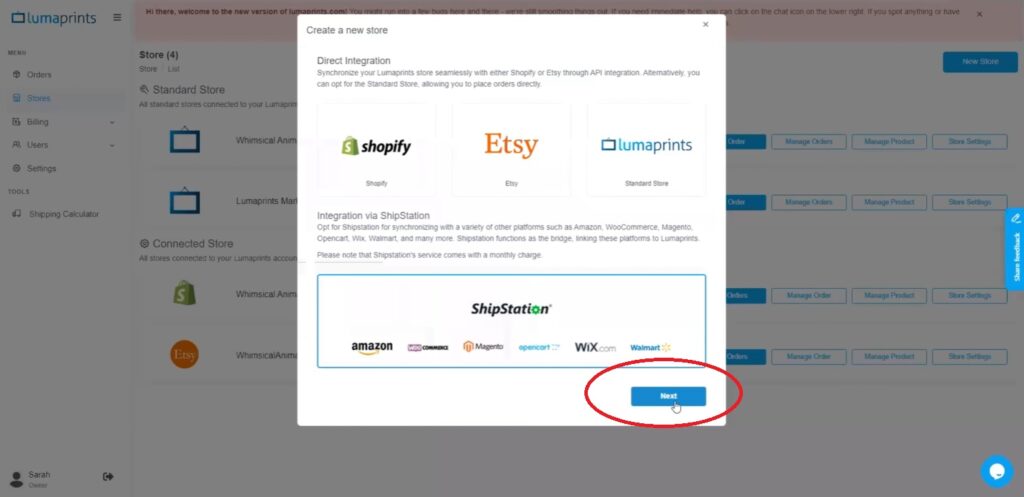
Once New Store has been selected, an option of which store to add will pop up. Click Shopify and click Next.
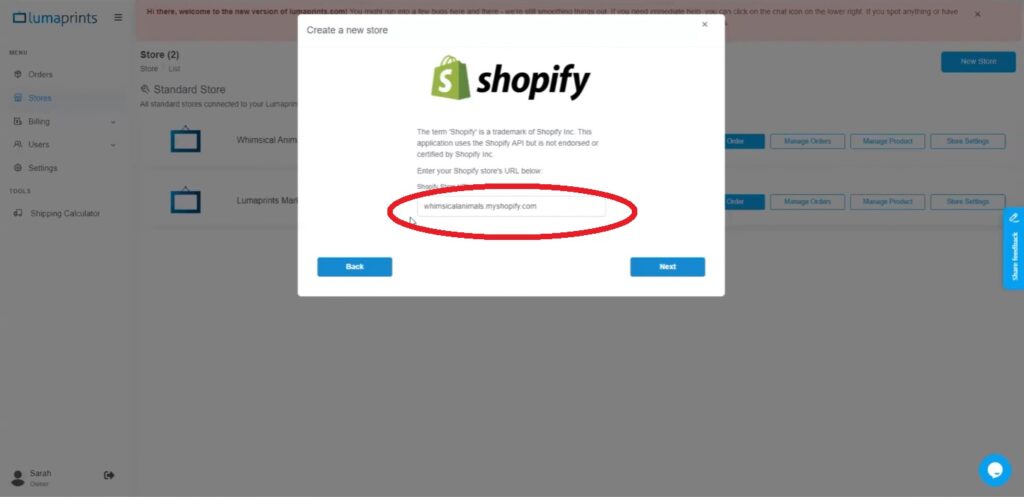
Another pop-up will appear that will let you put your Shopify Store URL.
To get your Shopify URL, simply log in to your Shopify Store, go to Settings on the bottom left corner of the page, and copy the URL.
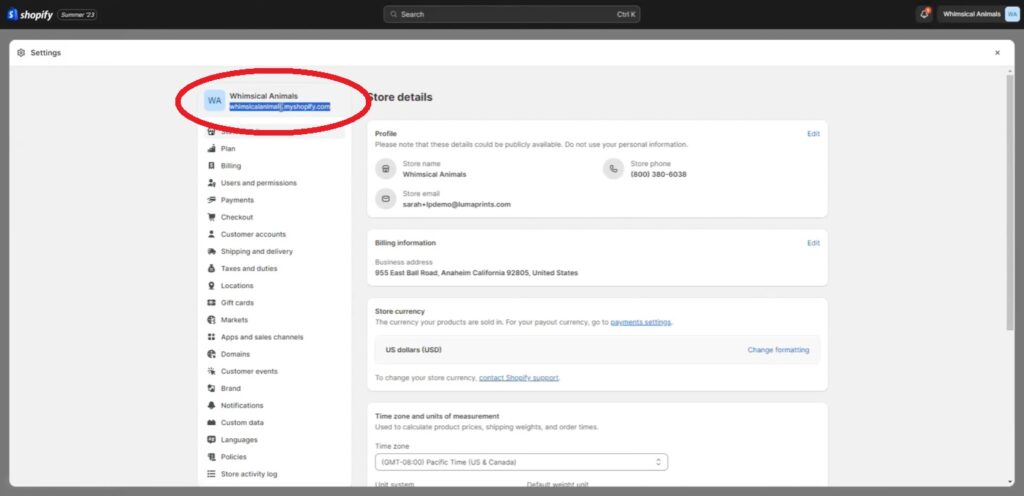
After copying the URL, go back to Lumaprints ordering site and paste it on the field available. Make sure to not include https:// or www. when pasting the URL. See the photo below as a guide.
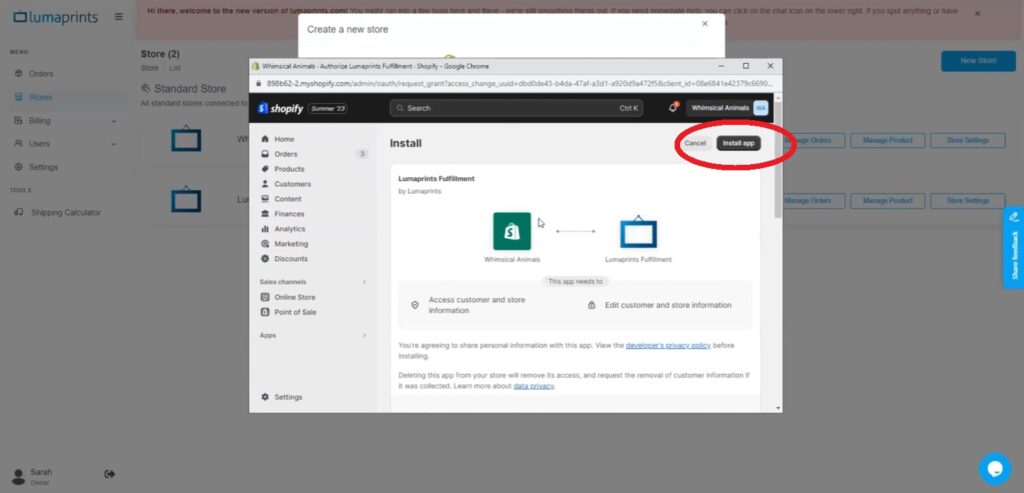
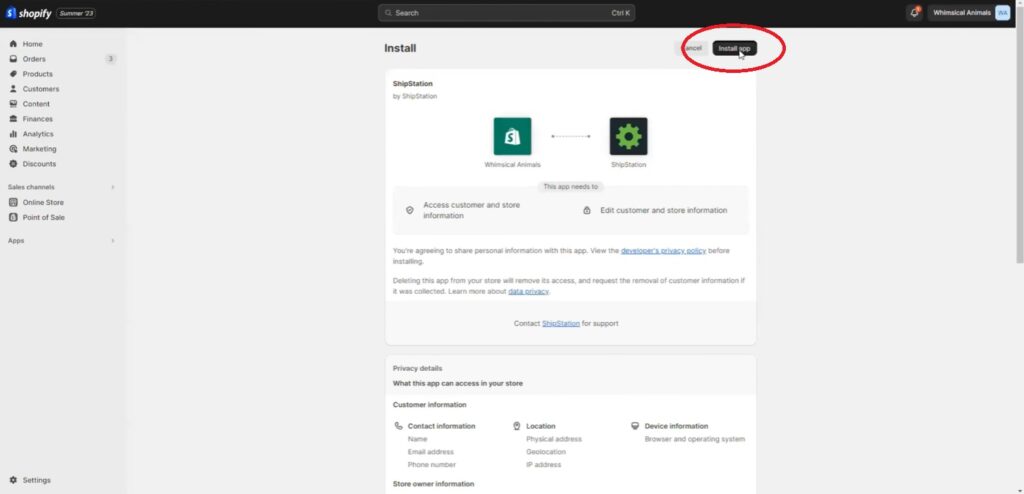
Once you click next, a pop-up window will appear that will prompt you to grant authorization for our ordering site as an application into your Shopify account. You can review all the permissions and authorizations that will be allowed once you grant access.
To integrate, click Install App on the top right corner of the pop-up window.
Direct Etsy Integration
If you wish to add a new store, click Stores on the left side of the dashboard and choose New Store.
Once New Store has been selected, an option of which store to add will pop up. Click Etsy and click Next.
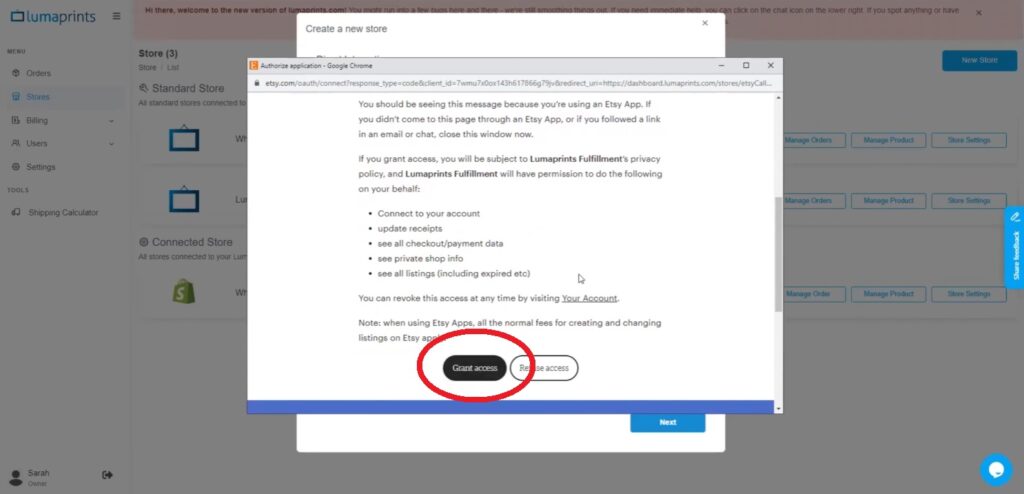
After clicking Next, a pop-up window will show up asking for permission to authorize the Lumaprints ordering app to your Etsy account. If you are not already logged in to Etsy, a log-in page will first pop up before the authorization page.
Then, scroll down and click Grant Access to successfully integrate your Etsy shop into your Lumaprints account.
Squarespace Integration
Please note that a Squarespace Commerce Advanced plan is required to use this integration, as it provides the necessary API access for integration.
Follow the steps below to integrate your Squarespace site as a connected store in your Lumaprints account:
- Log in to your Lumaprints dashboard.
- Click Stores from the menu on the left.
- At the upper-right corner of the page, click New Store.
- Select Squarespace, then Next.
- Copy and paste your Squarespace API key.
To retrieve your Squarespace API key, please follow these steps:
- Log in to your Squarespace portal.
- Go to Settings, then select Developer Tools from the menu on the left.
- Select Developer API Keys, then Generate Key.
- Assign a key name.
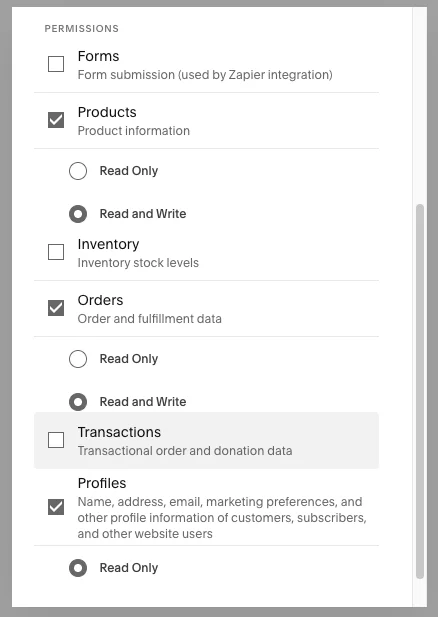
- Important: Set the Permissions exactly as shown in the screenshot below before saving:
WooCommerce Integration
If you wish to add a new store, click Stores on the left side of the dashboard and choose New Store.
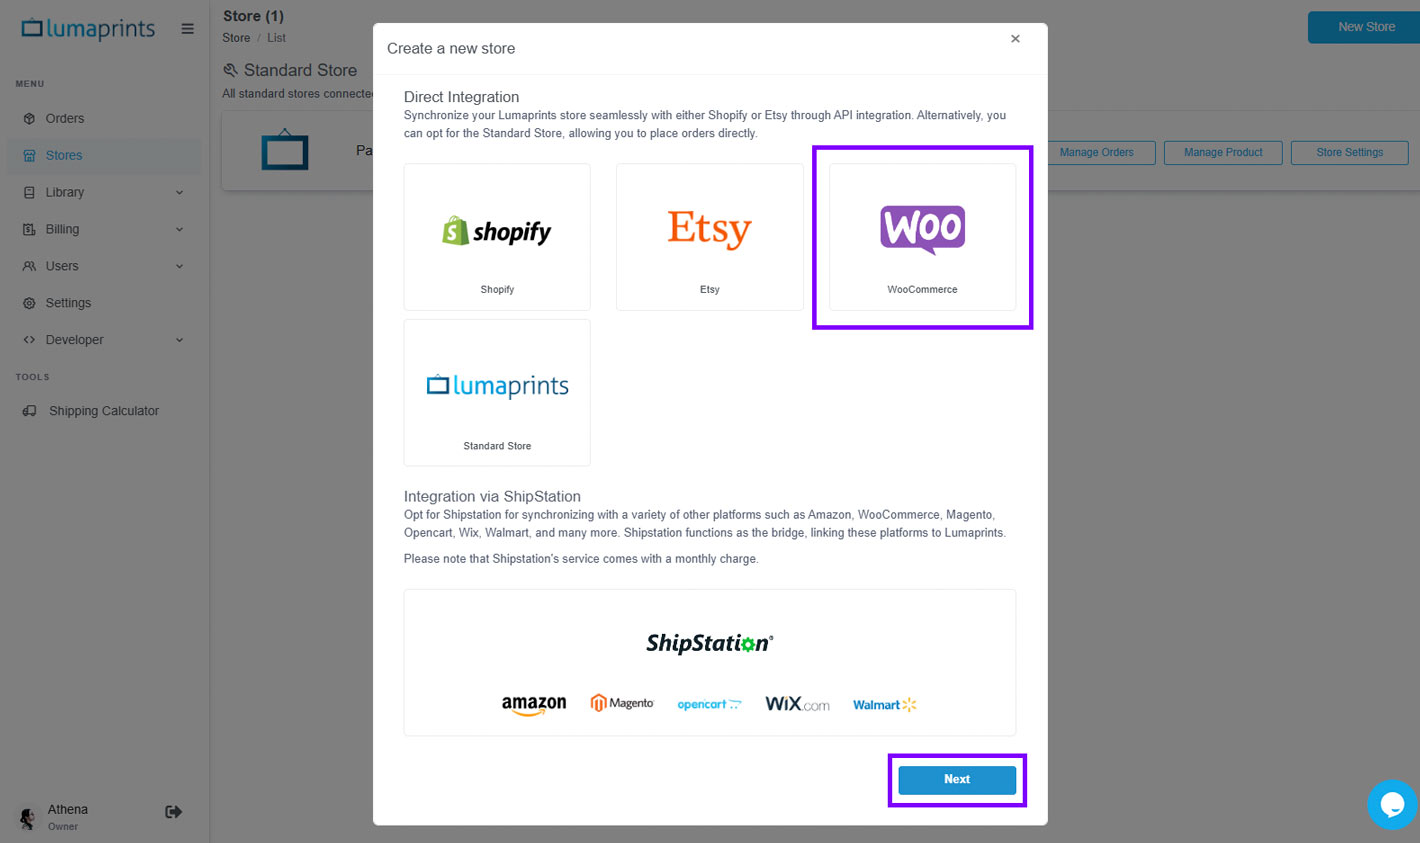
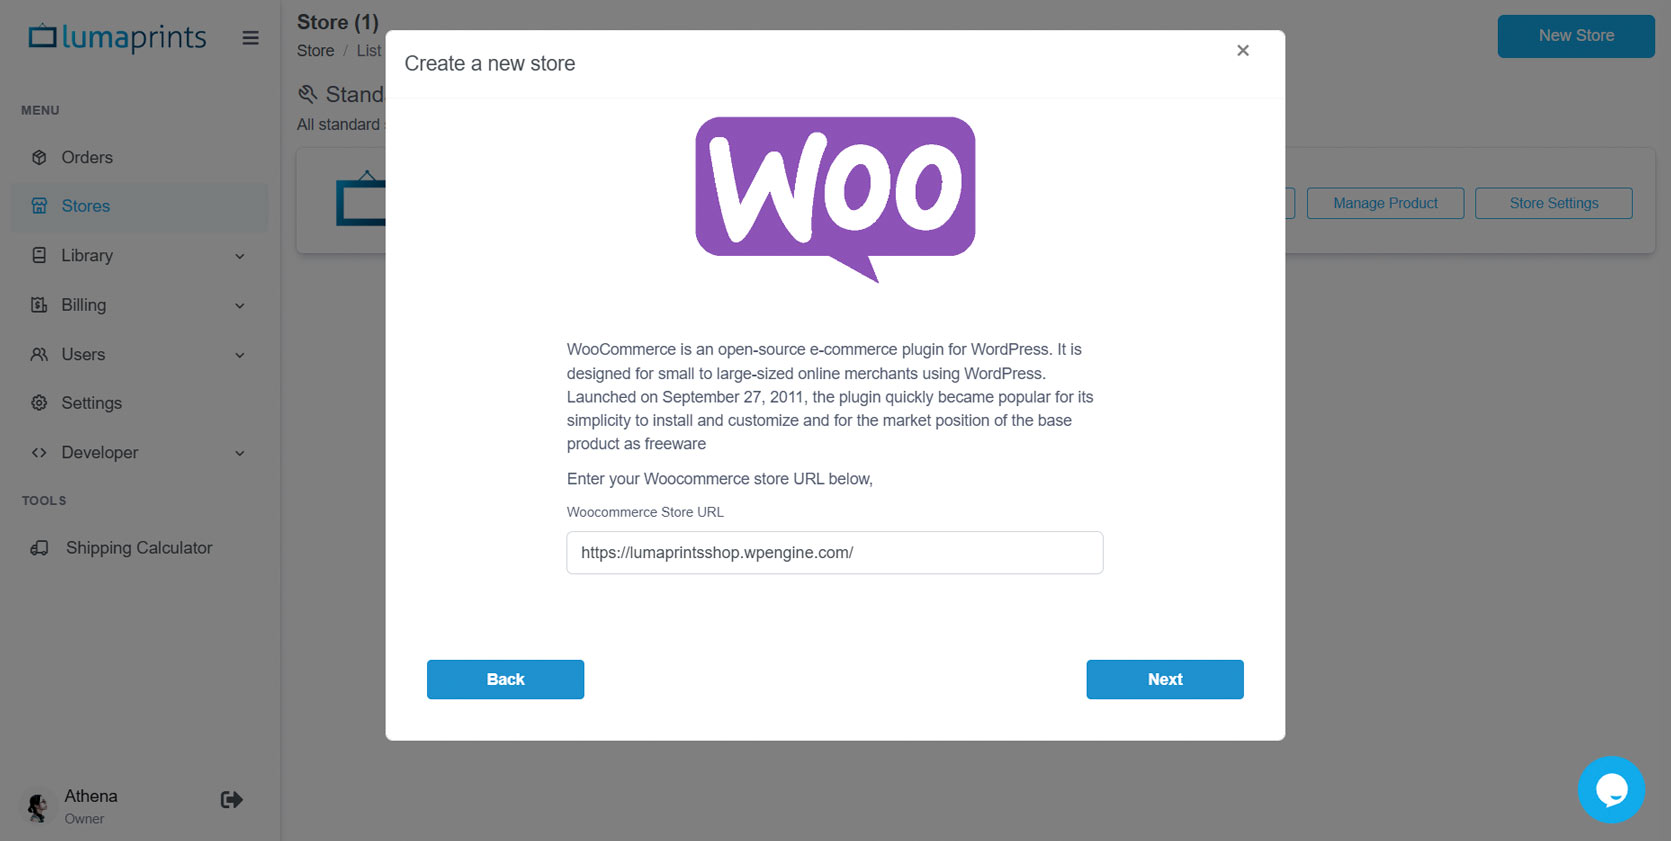
Once New Store has been selected, an option of which store to add will pop up. Click WooCommerce and click Next.
Another pop-up will appear that will let you put your WooCommerce Store URL.
To get your WooCommerce URL, simply log in to your WooCommerce Store, go to My Stores on your account page, and copy the URL.
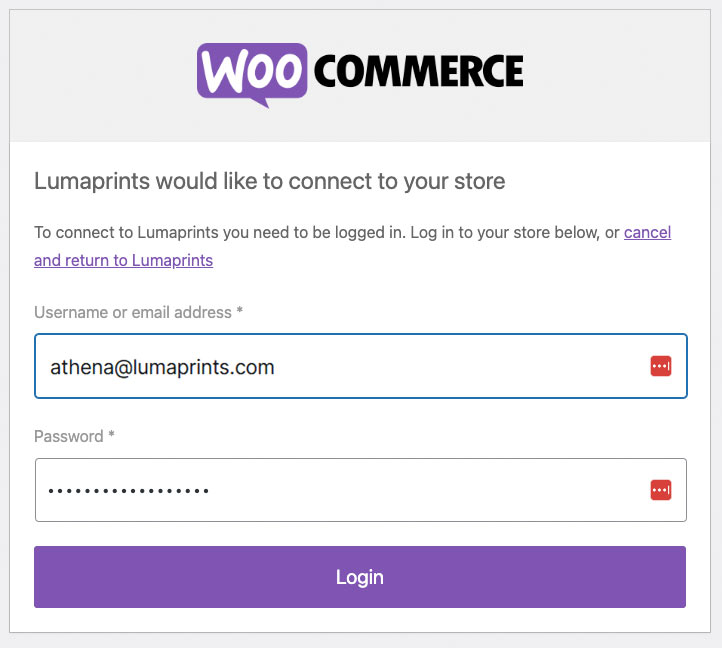
After entering your shop URL/Domain, login to your shop in WooCommerce.
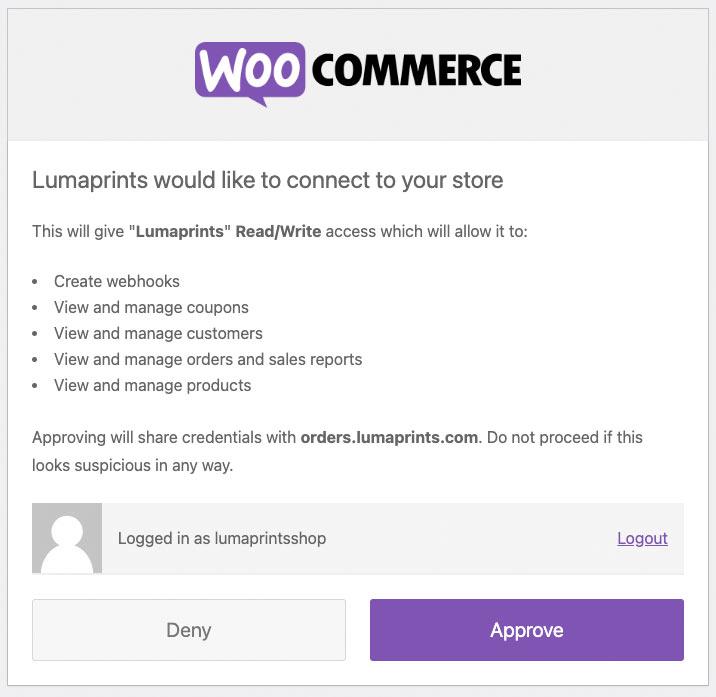
Approve the connection to successfully integrate your WooCommerce shop into your Lumaprints account.
Integrating with ShipStation
To connect a variety of other platforms such as Amazon, Magento, Opencart, Wix, Walmart, and many more, we use Shipstation which functions as a bridge in linking the said platforms to Lumaprints. Please note that Shipstation’s service comes with a monthly charge.
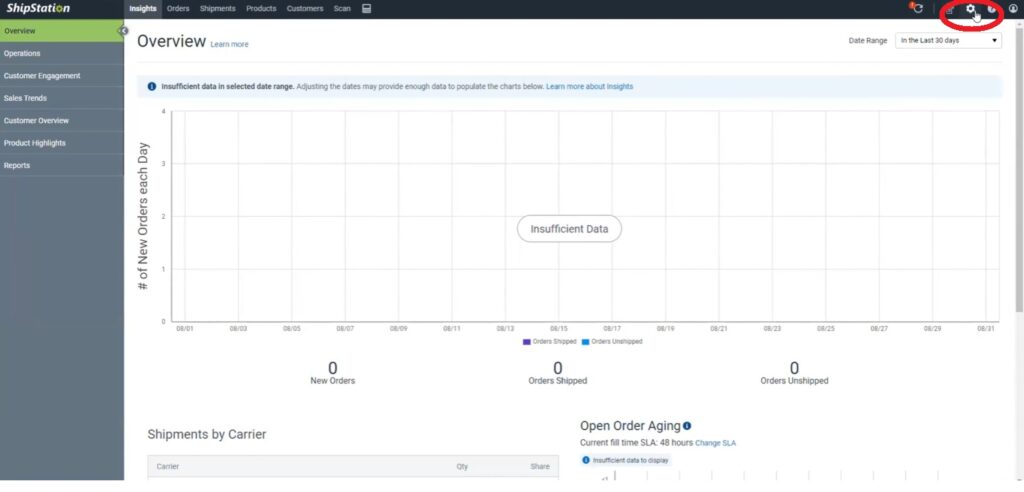
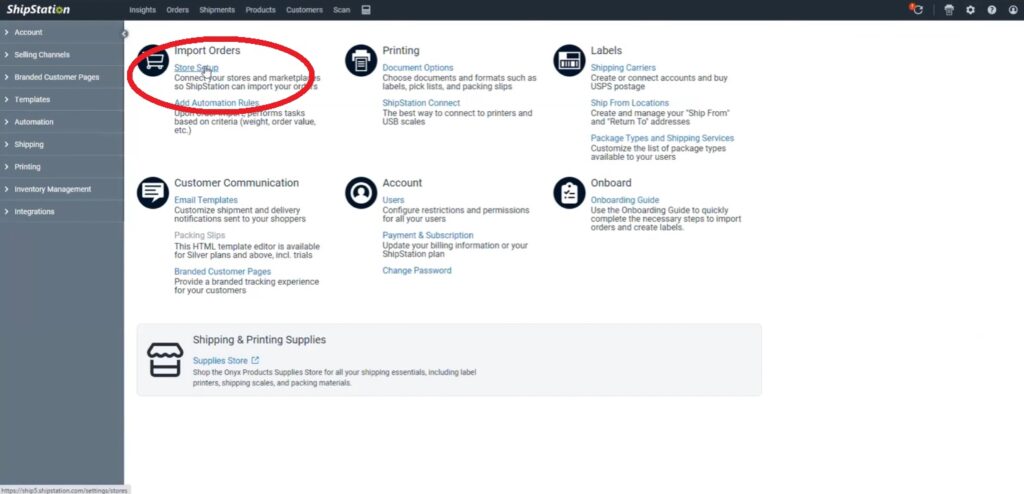
To integrate a new store using ShipStation, go to your ShipStation account, and click the Settings logo on the top right corner of your account.
Under Import Orders, click Store Setup.
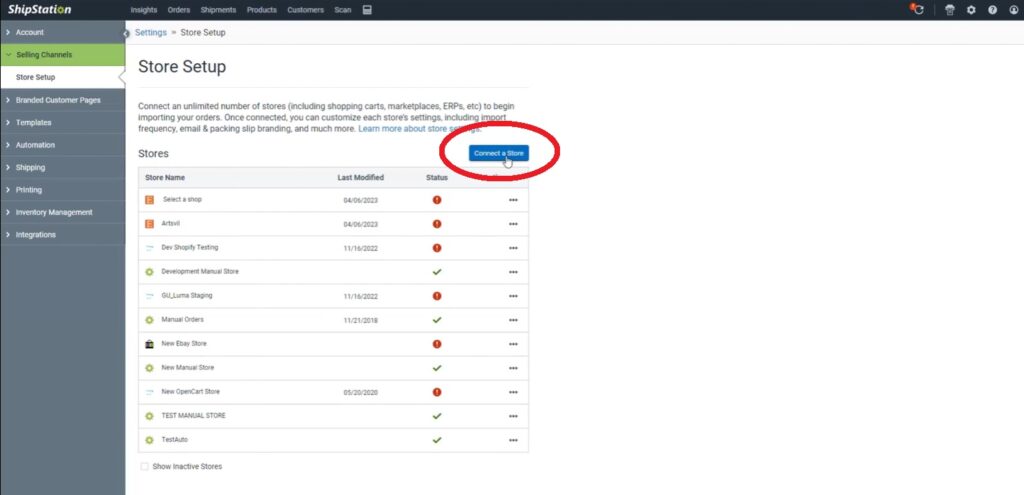
Once you’re on the Store Setup page, click the Connect a Store button.
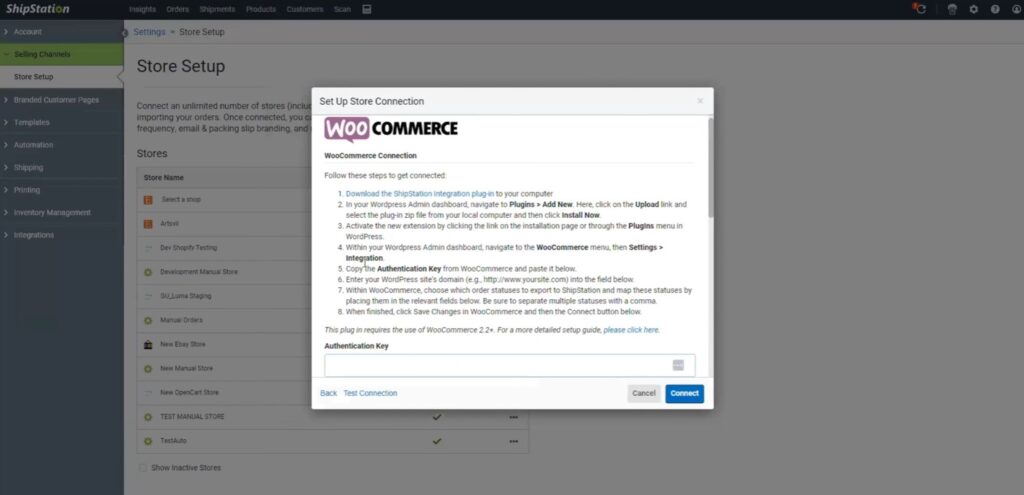
Please keep in mind that each marketplace has different rules on how to connect with ShipStation. Once you click on a specific marketplace, you can see a detailed step-by-step guide on how to connect. As an example, here is how to connect WooCommerce with ShipStation below.
For this demo, we will show how to connect Shopify with ShipStation.
After clicking Shopify from the list of marketplaces, it will take you to a page where you can set up a store connection. For this, you will only need your Shopify domain.
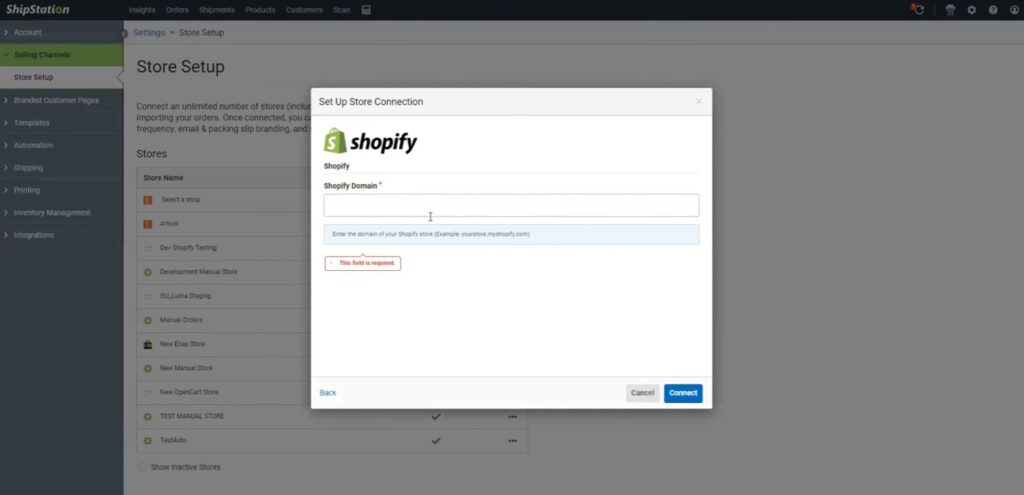
After inputting your Shopify domain, click Connect and that will redirect you to your Shopify page.
The new page will prompt you to install ShipStation as an app on your Shopify account. You can review all the permissions and authorizations that will be allowed once you install.
To install, click Install App on the top right corner of the pop-up window.
To add your ShipStation account to the Lumaprints ordering site, click Stores on the left side of the dashboard and choose New Store.

Once a New Store has been selected, an option of which store to add will pop up. Click Shipstation and click Next.
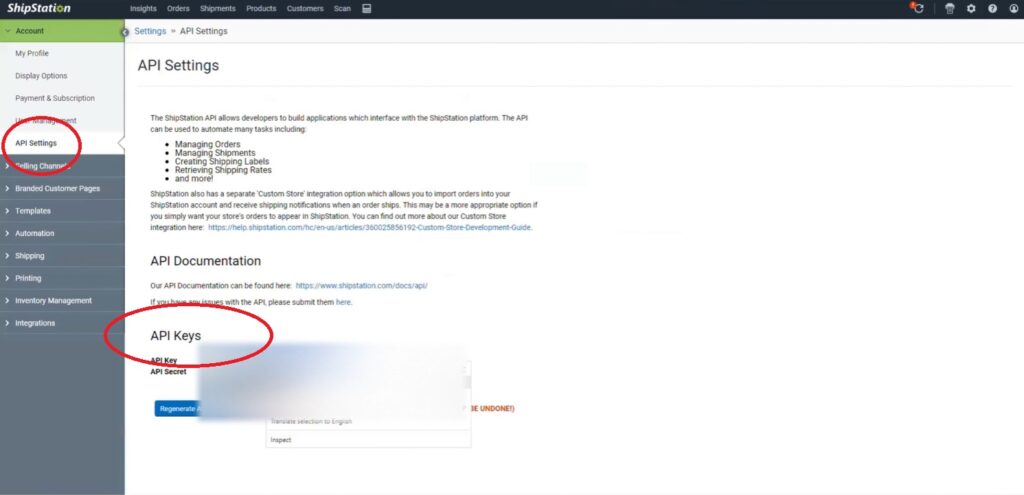
After clicking Next, a new window will pop up that will ask you to put in your API Key and API Secret.
To get your API Key, simply go to your ShipStation account, and click the Settings logo on the top right corner. Then, click API Settings. Once clicked, you can now see your API Keys.
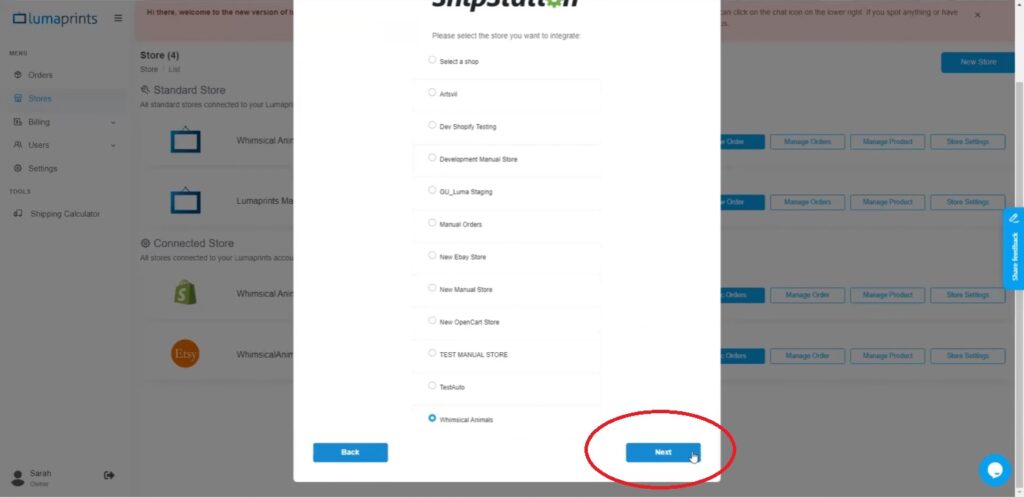
After inputting your API Keys, click Next and a new pop-up will appear, showing you all the stores you connected via ShipStation. You can, then, select the Store you want to integrate with your Lumaprints ordering account and click Next.
Integrated Store Settings
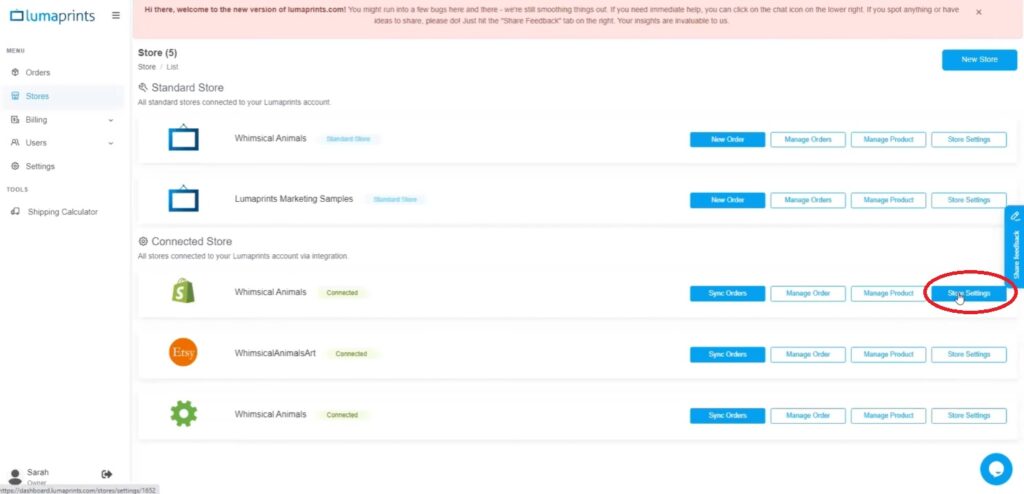
To modify your settings for a specific integrated store, you can go to Connected Store under Standard Store and click the Store Settings button.
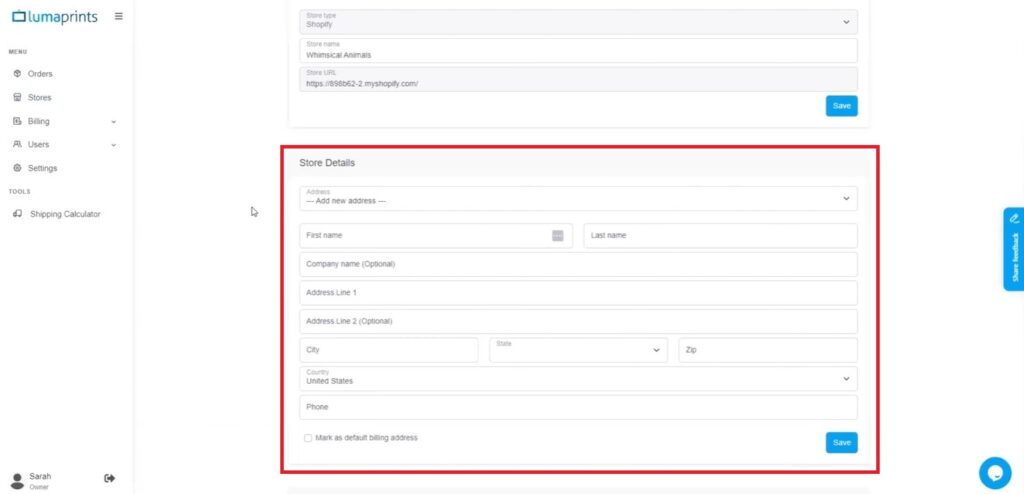
Here, you will see details that are automatically reflected once you integrate such as your Store Type, Store Name, and Store URL. You can also add your default billing address.
Order submission automation
If you have a standard direct Lumaprints store, this option will be available in your settings. This serves as a tool to set up your products ahead of time and your orders will automatically be fulfilled.
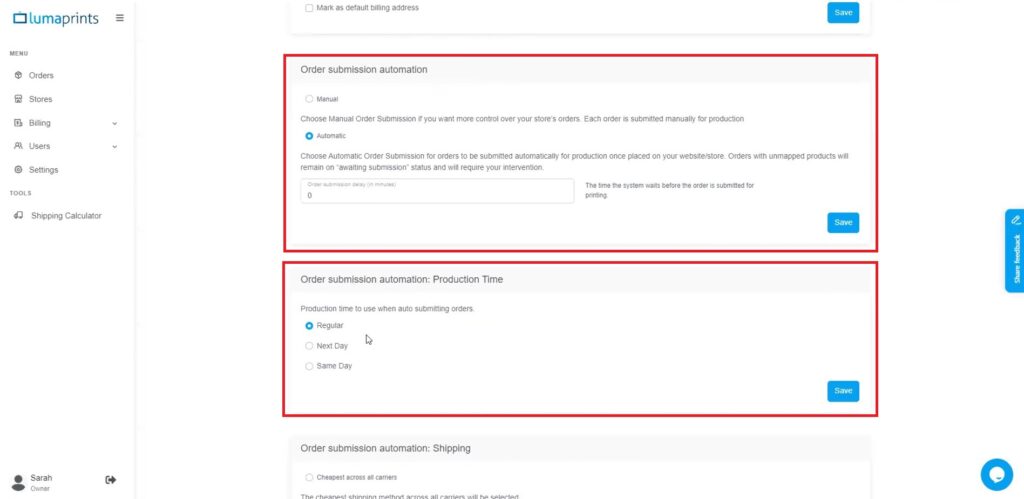
- If you choose an automatic order submission, you also have the option to input how many minutes of delay you want before the order automatically pushes through. This is helpful, particularly for orders with specific customer requests that need to be addressed.
- For automated orders, you can also choose the standard production time when auto-submitting orders. You can choose Regular, Next Day, or Same Day. Please note that Next Day and Same Day production time incurs additional charges.
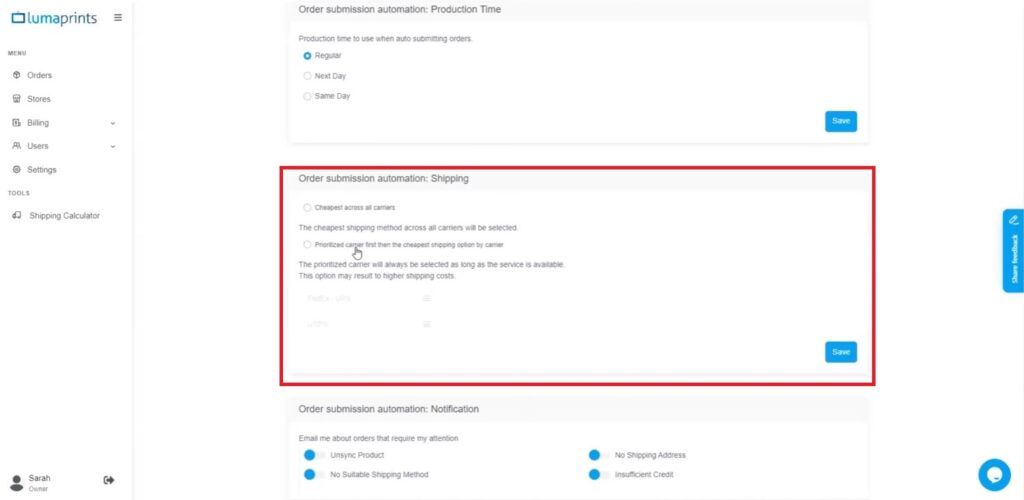
Order submission automation: Shipping
You also have the option to choose the cheapest carrier for shipping or prioritize a specific courier first, and then their cheapest shipping option. Please note that choosing the latter option can be applicable as long the service is available (limitations due to sizes, etc.), and may result in a higher shipping cost.
Order submission automation: Notification
You can also customize what email notifications you receive about unsuccessful automated orders. You can toggle email notifications for the following reasons/issues;
- Unsync Product. This option will send you an email notification once an order has not been able to push forward because it wasn’t synced.
- No Shipping Address. For when a customer’s shipping address is incomplete or unavailable.
- No Suitable Shipping Method. Notification for large orders that are too big for shipping.
- Insufficient Credit. To be able to enable order automation and push through an order, store credits must be sufficient. You can add the store credit to your account through the Billing section on the left side of the dashboard. These credits are refundable.
We recommend having all the said email notification options toggled on for smoother automated order fulfillment.
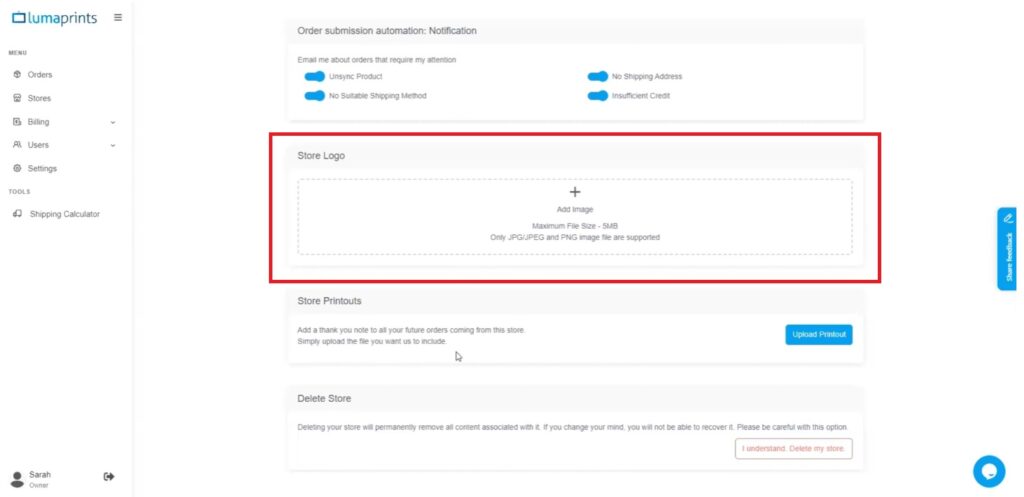
Store Logo
We use the files uploaded here to add branding to your orders by printing them at the back of your canvas bleeds.
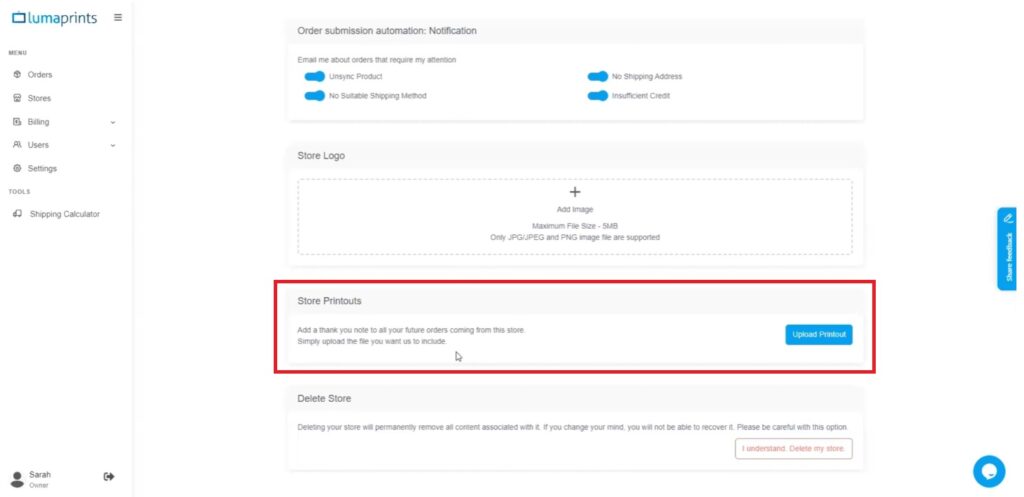
Standard Printouts
You can also include any personalized message, thank you note, discounts, or invoice you’d want us to include in your orders.
Store Product Mapping
Lastly, to do automated processing on your orders, you have to sync your products.
Click Manage Product to manage all products on your integrated store.

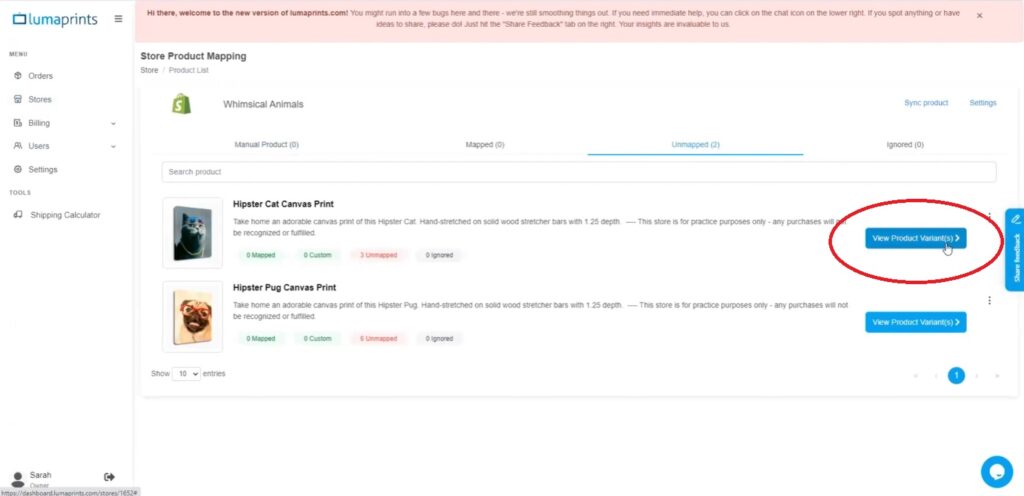
All products on your store will automatically be categorized as unmapped, which means your products pulled from your store as ready to set up for a faster automated order placement.
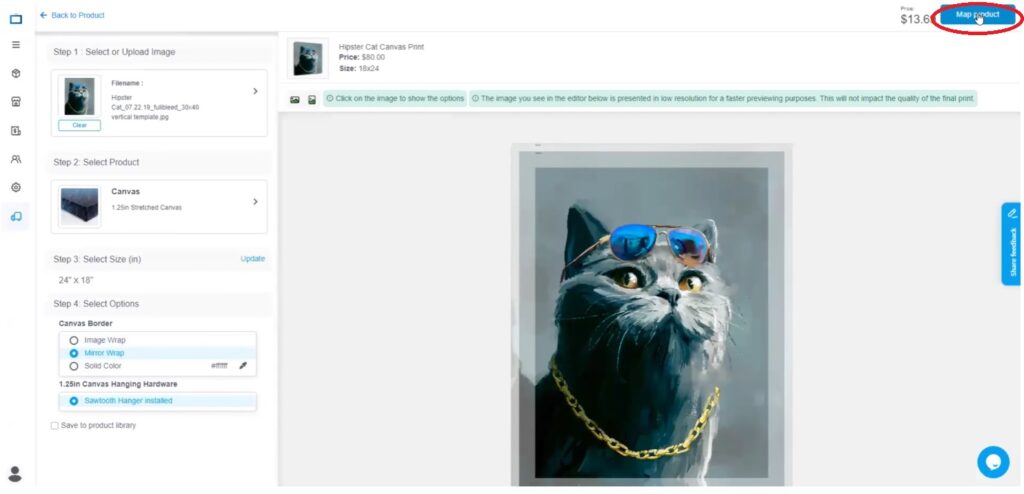
Mapping Your Product
To map your product, simply click View Product Variant(s) from the Unmapped tab.
Select Map Product to map a product on each variation.
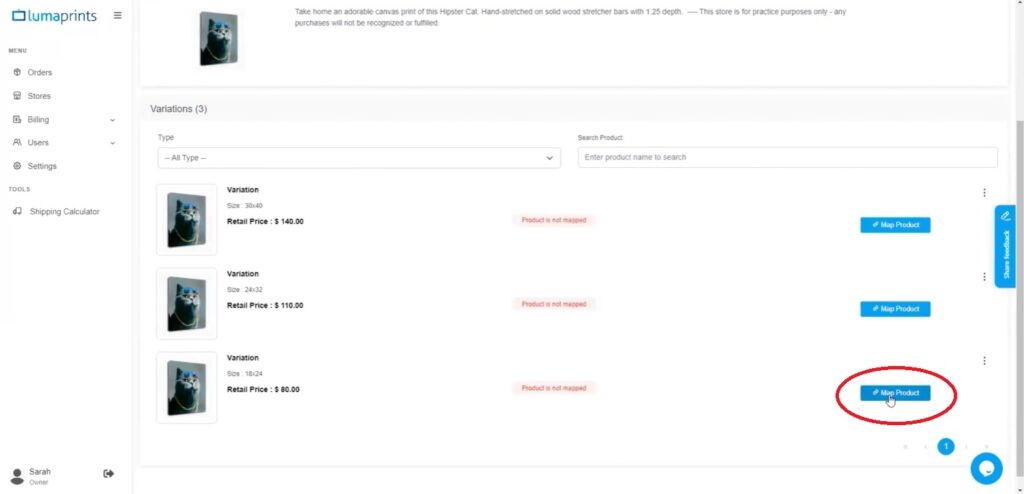
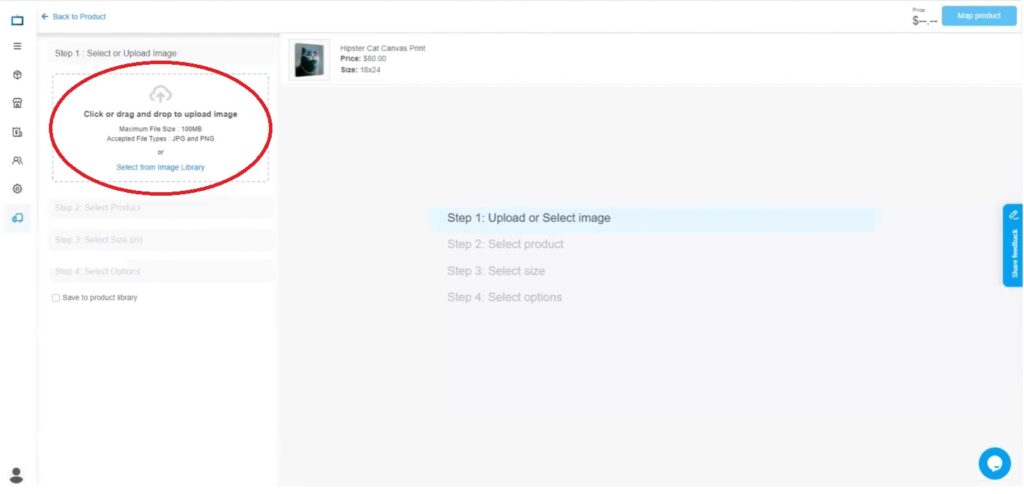
Upload your image.
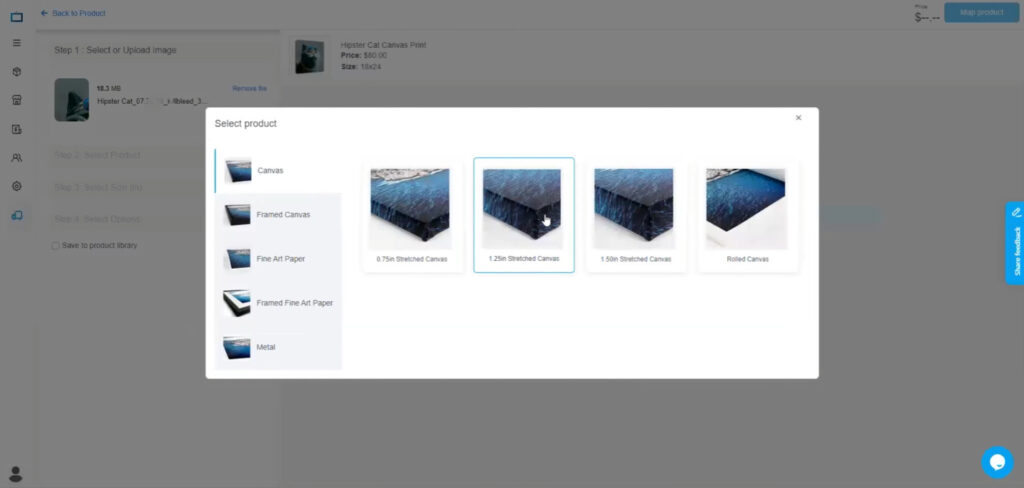
After uploading your image, select the product that you want to map.
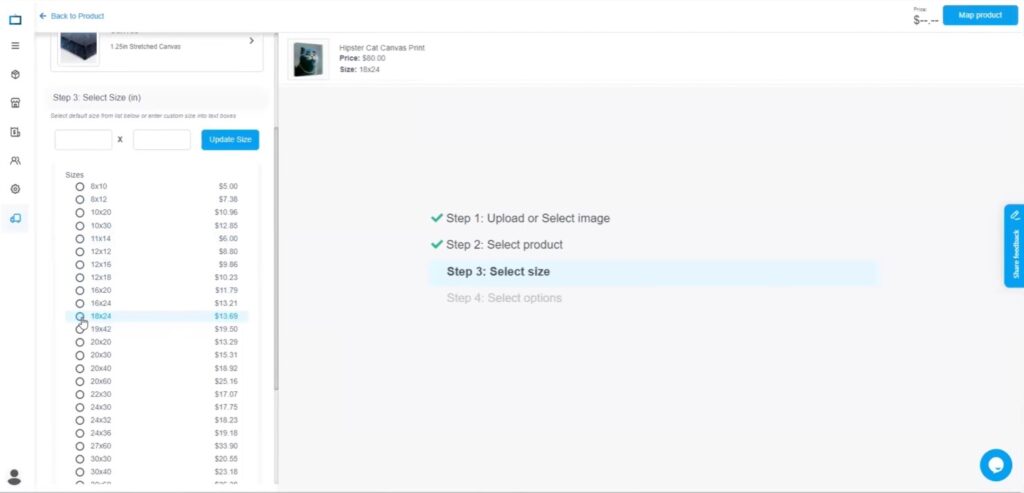
Select Size.
Lastly, select a Canvas Border as well as a Canvas Hanging Hardware.
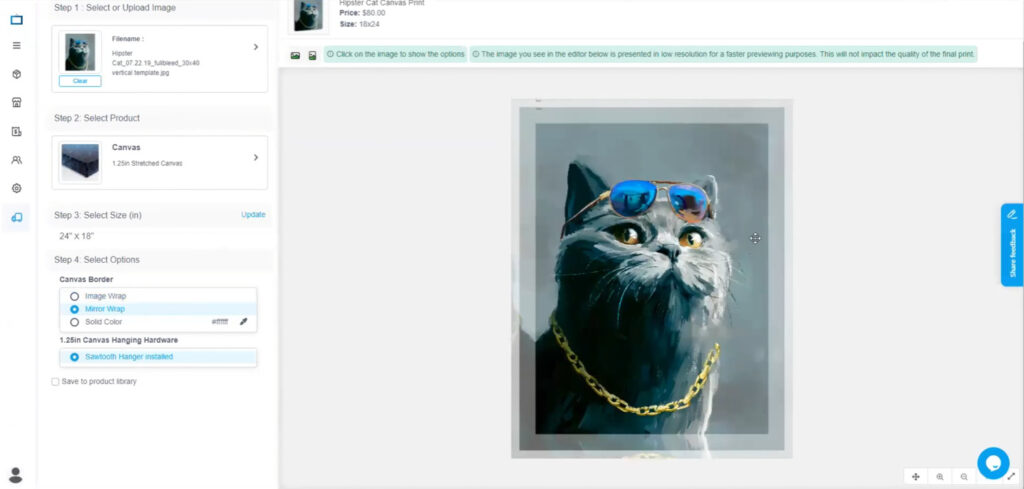
Once you’re done, you can click Map Product on the top right corner of the screen.
If a product is already mapped, all orders that come in of that specific product will now be processed automatically, if Order Automation is enabled.
Watch this webinar through this link: https://youtu.be/Sl_Zz-L9JNk?si=1_3yYq-M3Z3BajeM
Get access to all our webinars on our YouTube page: www.youtube.com/@lumaprints


When setting up the integration with Etsy, how do you set up the shipping cost in Etsy? I like to offer my customers free shipping.
Hi Lisa,
We recommend integrating the shipping cost into the price of your product.
On our page https://www.lumaprints.com/pricing/, we have shipping costs for select sizes but you can also calculate shipping for specific sizes in your Lumaprints dashboard.
We recommend using a NY address to get a shipping rate on the higher end as shipping costs vary depending on the address.
Let me know if you have any follow up questions!
Best regards,
-Lumaprints Marketing Team
I recently found Luma Prints and Placed an order for assorted and varied Prints; matted and frame paper as well as canvas with and without frames. I LOVE the quality! And the packing was Fabulous!
I seriously want to use your POD products and services…
1st QUESTION – I’ve a stagnate Squarespace website; it’s been waiting for the POD aspect to make it exciting. Do your services work connect with Square?
2nd QUESTION – Will international shipping be possible? When I first checked LUMA out…that seemed confusing. International shipping would be marvelous, but right now, just shipping within the USA will be a tremendous help!
I’m excited! and have been passing your name and showing the quality of your work to fellow artists here in Santa Fe, NM!
3rd ISSUE… I will play with your current standard sizes and perhaps do some cropping of images.
But do you do custom sizes? I’ve yet to Find any notice of that. During Covid I was using what ever I had to stretch canvases on… I’ve some odd sized paintings that people love, but can’t afford the original….!
I
Hi Raya,
We’re glad to hear that you are happy with the quality of our prints. We hope you’ve continued to use us since.
Here are some answers to your questions:
1 – We can integrate with Squarespace through ShipStation.
2 – International shipping is possible but not always recommended due to limited sizes, potential customers/duty fees, etc. It ends up becoming more expensive for the customer.
3 – Yes, we do custom sizes. Each product has a different maximum size limit, but we are able to do custom sizes for all of our products.
Hope this helps,
Lumaprints Marketing